Search This Blog

Friday, September 28, 2012

Golden Baked Chicken: Skin On or Off

Golden Baked Chicken


Hi everybody :)

How do you like your chicken, skin on or off? I'm normally a skin on kind of person but I sometimes find myself pulling the skin off of fried chicken after it been fried or baked chicken after it been baked. I know it kind of weird, but that's how I am.  But, I love skinless boneless chicken breast.

I came across this recipe from Taste of Home Potluck for skinless chicken and decide to give it a try.

Golden Baked Chicken 

Ingredients


2 cups mashed potato flakes
3/4 cup grated Parmesan cheese
2 tablespoons dried parsley flakes
1 tablespoon paprika
3/4 teaspoon garlic salt (I used Ms Dash Onion and Herb Seasoning & Rosemary Basil and Citrus Salt )
3/4 teaspoon onion powder
1/2  teaspoon pepper
1  cup butter, melted
3 broiler/fryer chicken (3 to 4 pounds each), cut up and skin removed

Directions

In a shallow bowl, combine the potato flakes, cheese, parsley, paprika, garlic salt, onion powder and pepper
Potato Flakes Mixture


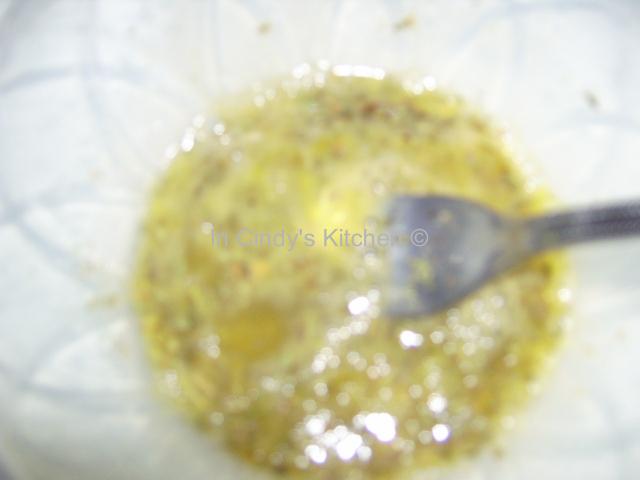
In another shallow bowl, add butter. Dip chicken into butter, then into potato flake mixture.
Chicken in Potato Flakes Mixture


Place on two greased 15-in. x 10-in. x 1-in. baking pans. 

Chicken Coated with Potato Flakes Mixture


Bake at 375 for 50-60 minutes or until the chicken juices run clear, yield: 12 servings.


What I Did and/or Think:
First I adjusted the recipe to do a serving of six. I did all drumsticks because they are my favorite part of the chicken. The original recipe is above, the changes I made are in Italic.

As you can see from the photos I followed as stated in the recipe to remove the skin from the chicken. The chicken was still good, but I have to admit I miss the skin. The skin holds in the juices and makes the outside more crunchy while keeping the inside moist. So the next time I make this I'm keeping the skin on.


ENJOY! Come again...

Linked to 
Foodtastic Fridays
The Better Baker Weekend Potluck
Foodie Fridays @ Designs By Gollum

Thursday, September 27, 2012

White Acre Peas & Okra: Fond Memories

White Acre Peas & Okra


Hi everybody :)

If you've being following my blog from the beginning, you've heard me mentioning my mom a couple times. She would have been 73 this month. She lost her battle with breast cancer back in October 2004. Another milestone...when times like these roll around I cherish the fond memories of her and hold them tightly.

Today I'm sharing one of my fondness memories of her with you. Every Spring and Fall we would plant a garden. Sometimes we would spend hours working in it, just she and I. She love to planted peas, okra, corn, squash, collards, tomatoes, the list goes on and on. Whatever she plant, it just seem to thrive, she definitely was born with a green thumb. I inherited my green thumb for her too, not a year went by without me having a garden...although not as big as the ones we did together but a garden nevertheless.

I remember us shelling peas whenever harvest time rolls around. She would cook some of them to eat then and blanch and freeze the rest for later. I love being in the kitchen watching her cook. I picked up a lot of my cooking talents from her also. Which brings me to today recipe,  so lets get it started...

White Acre Peas & Okra

Ingredients


6 cups peas (I used frozen white acre peas)
1 pound smoked turkey meat: wings, drumstick, (cut into pieces) or tails ( I used turkey tails)
1 teaspoon Better than Bouillon Chicken Base, reduced sodium
Water; enough to cover the meat
Salt & Pepper to taste
2 tablespoon butter
1 1/2 cup okra (I used frozen)

Cook smoked turkey meat on simmer in a medium pot with enough water to cover until tender. (I cooked mine for 1 hour.)


Remove from heat, allow to cool enough to remove fat and bones from the meat and return to pot with the stock.


Meanwhile in the same pot with the turkey meat and stock add the peas, chicken base, salt,  pepper and butter. Cook, covered, on simmer until peas are tender. (I cooked mine for 40 minutes.) Remove from heat and add okra.


Gently press okra down into stock and cover with lid. (The heat from the pot will cook the okra.) Let sit for 5 minutes and serve.


Before I go, I want to leave you with a little word of advice; MAKE EVERY MOMENT COUNTS. I didn't know it at the time, but I know now...those moments with her were life timeless treasures and I'm so grateful I had the chance to experience them. Tell your family and friends that you love them, not only tell them but show them. The word;  love is a verb and requires action.

Here's to you, Mom.


ENJOY! Come again...

Linked to  
Tastetastic Thursday @ A Little Nosh
Full Plate Thursday @ Miz Helen's Country Cottage 
 The Mandatory Mooch Tasty Thursday 
Show Case Your Talent @ What's Cooking Love
Carole's Chatter: Peas or Green Beans Food Link Friday

Tuesday, September 25, 2012

Pepperoni Rolls: PIZZA IN A ROLL....Pizza Rolls!

Pepperoni Rolls


Hi everybody :)

A few years ago, I discovered Gooseberry Patch and their wonderful organization of cookbooks and more. I was delighted that I actually won a few of their cookbooks. One of them was Simple Shortcut Recipes; I won at Eat Cake for Dinner.

Jenn has a fantastic blog , great recipes, beautiful pictures, lots of followers, everything.  If you haven't heard about her blog, you must go and check it out.

Now...on to the recipe, remember the Cheddar Cheese Loaves  I prepared last week, but only cooked one loaf.  Well, I'm now ready to share what I did with the dough of the second loaf.


Pepperoni Rolls adapted Gooseberry Patch Simple Shortcut Recipes


 2 eggs, beaten
1 teaspoon dried parsley
1/2 teaspoon garlic salt (I used Mrs. Dash Onion and Herb Seasoning and Rosemary Basil and Citrus Salt)
1 teaspoon dried oregano
1 cup grated Parmesan cheese (omit)
1/2 teaspoon Salad Supreme                
2 loaves frozen bread dough, thawed (I used 1 Cheddar Cheese Dough )
16-oz. pkg. sliced pepperoni
16-oz. pkg. shredded mozzarella cheese
1/2 cup Mild Cheddar Cheese
Garnish: pizza sauce, warmed

In a bowl, mix eggs, seasonings and Parmesan cheese; set aside,
Egg Mixture


Roll out first loaf into a rectangle on a floured surface.
Cheddar Cheese Dough


Spread half of egg mixture on top;
Added Egg Mixture


layer with half the pepperoni and sprinkle with half the mozzarella Cheese.
Added Pepperoni & Cheeses


Roll up jelly-roll style; place seam-side down on an ungreased baking sheet. Repeat process for second loaf.
Rolling up Jelly-Roll Style


Before Baking


(I went ahead and cut mine before baking. I baked them for 20 minutes.)

 Bake at 350 degrees for 20 to 30 minutes, until lightly golden. The bottom of the rolls will be browned.
Cool and cut into 2-inch slices; serve with pizza sauce. Makes 20 to 24 servings. (I made 12 buns)

What I Did and/or Think:
First, I did only half the recipe and used the prepared Cheddar Cheese Dough for the dough. I also cut the roll before baking it instead of afterward like the recipe stated. The other changes are in Italic stated above.

The Taste: I LOVE, LOVE, LOVE the taste of this, so did my son and his friend, they ate most of them :) These buns are basically PIZZA IN A ROLL....Pizza Rolls!  This is now my new way of making pizza, and cheese in the crust is definitely the way to go. This goes without saying, but I simply gotta say it anyway ...IT'S ANOTHER WHAT.... REPEAT!


ENJOY! Come again.....

Linked to
Make Ahead Meals for Busy Moms: Melt-In-Your-Mouth Monday Recipe Blog Hop #84 ,
Pizza Blog Hop
Recipe Sharing Monday @ Jam Hands  
Kathe With an E   You're Gonna Love It
33 Shades of Green-Tasty Tuesday

Tuesday-Talent-Show:  Chef In Training
Tasty Tuesday (Food Only) @ Naptime Creation

Followers