Asiago Ciabatta: Making Ciabatta

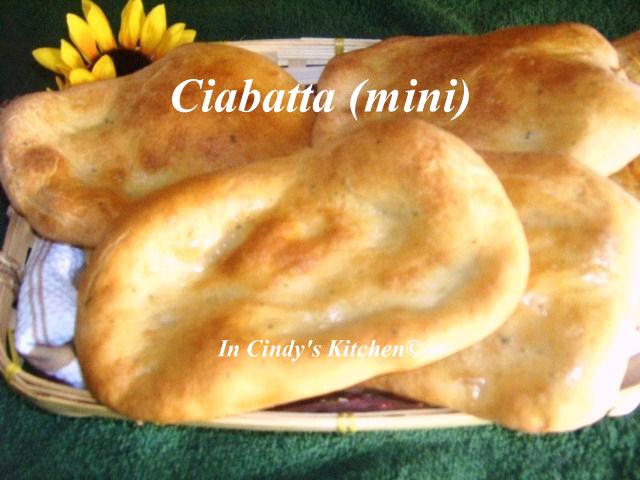
It's time to bake some bread, I been working on a recipe I think you'll going to love. I always wanted to make homemade ciabatta loaves, so today I'm giving it a try :) The ciabatta start off with a sourdough starter called a biga starter. The biga starter sit overnight at room temperature for up to 20 hours, so plan ahead if you're are making these loaves. The starter is added to the remaining ingredients, the dough is than proofed up to 2 more hours. Then it is carefully shaped into long loaves about 12 x 4 inches each, proofed 45 more minutes and baked. I make a few changes by forming 1 big loaf and 4 mini loaves, adding Asiago cheese to the big loaf. Let's get it started...

1 1/2 cups (6 3/8 ounces) King Arthur Unbleached All-Purpose Flour
1/4 cup (1 ounce) pumpernickel, rye, or whole wheat flour
1 cup (8 ounces) water
1/8 teaspoon instant yeast
Dough
all of the starter
2 1/2 cups (10 5/8 ounces) King Arthur Unbleached All-Purpose Flour
1/2 cup (4 ounces) water
1 tablespoon Pizza Dough Flavoring (optional)
1 1/2 teaspoons salt
1/2 teaspoon instant yeast
4 to 5 ounces Asiago or Parmesan cheese, cut into 1/4-inch dice (about 1 cup), plus extra for grating over the top of the bread
Biga:
Mix all of the biga ingredients in a medium-sized bowl until well-blended. (I mixed it and covered it at 12:00 p.m. yesterday.)

Cover the bowl, and leave it at cool room temperature (68°F-70°F) for 12 to 20 hours, until the biga is very bubbly. (I let it sit until 8:00 a.m. today)

Mix the biga and the remaining dough ingredients, except the cheese,


Allow the dough to rise, in a greased, covered bowl, for 1 to 2 hours, until it's very puffy. Note: You can also mix this dough in a bread machine set on the dough cycle; add the diced cheese several minutes before the end of the final kneading cycle.
Turn the dough out onto a well-floured surface, and shape it into two long loaves, about 12 x 4 inches each. Place the loaves, floured side up, onto parchment paper (if you plan to bake on an oven stone) or baking sheets.(I sprinkled with cheese before the 45 minutes proofing. Be very careful when shaping to keep the dough light and airy. Don't use foil because the cheese will stick to it, I find out the hard way)

Bake the ciabatta in a preheated 450°F oven for 22 to 26 minutes, until it's golden brown. Remove it from the oven, and cool on a rack. Yield: 2 loaves.
Source: King Arthur Flour

I really enjoy making these loaves, even though it was a bit time consuming.
The taste: I love the taste of the Asiago loaf better than the mini ones. The structure was airy with a chewy texture. To get the right structure be very careful when shaping, don't press the dough down, you want it to be nice and puffy with big air pockets. I will be REPEATING this one ladies. My loaves weren't as puffy as I would have liked, but they were delicious!
UPDATE: Here's what I did with the mini loaves. Mini Bruschetta Pizzas

Linked to:
YeastSpotting! @ wildyeast
The Better Baker Weekend Potluck
BYOB @ Roxana's Home Baking : Baking Your Own Bread
Foodie Fridays @ Designs By Gollum
Full Plate Thursday @ Miz Helen's Country Cottage
Oh fresh Asiago Breads oh so good.
ReplyDeleteHi Cindy,
ReplyDeleteWe will just love this Asiago Cibatta, I can almost taste this fabulous bread.
Hope you are having a great Valentine Weekend and thank you so much for sharing with Full Plate Thursday.
Come Back Soon!
Miz Helen
if you didn't want to use the rye or wheat flour would you just add the same amount only in unbleached flour?
ReplyDeleteHas anyone made this recipe using sourdough starter?
ReplyDelete