Cereal Cookie Bars: Rice Crispy Treat Upgraded
Hi everybody :)
I was looking for something in my cookbook collection, that I can make to satisfy my sweet tooth in a hurry. These bars 'jumped up' at me from the pages of my cookbook. They're quick, don't require much cooking time, and loaded with goodies of the sweetest kind; so bars, it is. Let's get it started...
Cereal Cookie Bars
9 cups crisp rice cereal
6-1/2 cups quick-cooking oats
1 cup cornflakes (I used crushed graham crackers)
1 cup flaked coconut
2 packages (one 16 ounces, one 10-1/2 ounces) miniature marshmallows
1 cup butter, cubed
1/2 cup honey
1/2 cup chocolate chips (I used butterscotch chips)
1/2 cup raisins (I used white chocolate chips)
1/2 cup M&M's minis (I used regular)
In a large bowl, combine the cereal, oats, cornflakes and coconut; set aside.
In a large saucepan, cook and stir the marshmallows and butter over low heat until melted and smooth. Stir in honey. Pour over cereal mixture; stir until coated. Cool for 5 minutes.
Stir in chocolate chips, raisins and baking bits. Press into two greased 15-in. x 10-in. x 1-in. pans.
Cool for 30 minutes before cutting. Yield: 6 dozen.
Source: Taste of Home 2008 Quick Cooking Annual Recipes or here.
What I did and/or Think:
I divided the recipe in half and used a 13-in.x9-in. pan for thicker bars, otherwise the bars will be very thin. The other changes I made are in Bold, Italic, and Purple.
The Taste: I love the combinations of flavors. Great REPEAT. It's like a rice crispy treat upgraded to the next level. I think next time I will do a fruits and nuts combination.
ENJOY! Come again...
Linked to:
Strut Your Stuff Saturday @ Six Sister's Stuff
Show and Tell Saturday: Be Different...Act Normal
Sweet Saturday Link Party: The Gingerbread Blog
Finding the Delicious & Pretty Linky Party
Scrumptious Sunday Recipe Link Party @ Addicted Recipes
Marvelous Mondays @ This Gal Cooks
Melt In Your Mouth Monday @ Make Ahead Meals for Busy Moms
Flour Me With Love: Mix it up Monday!
The Chicken Chick: Clever Chicks Blog Hop
Watch Out Martha
Tried and True Recipe Party 3
The Country Cook:: Weekend Potluck
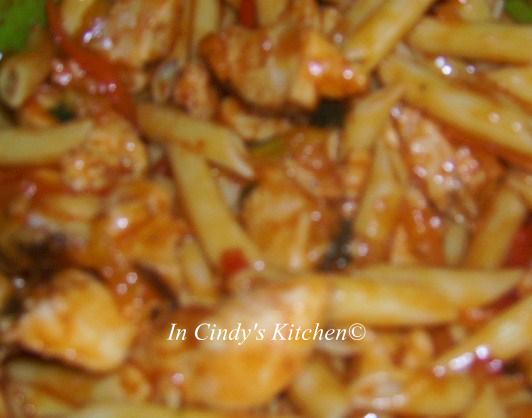
Sweet-n-Spicy Pasta Salad
Hi everybody :)
Before we get to this recipe, I like to tell you how I came up with it. This salad was inspired by a Chicken Fajita dish at my local Winn Dixie. It contained grilled chicken strips, sweet bell peppers, red onions, zucchini slices, and this sweet and spicy red sauce that blends it all together. It cost about $5.30 per pound. I would buy this mixture, not to make fajitas but to add to pasta to make a delicious salad because I love the combinations so much. Now, I put my taste buds to work to reproduce that great favor and can make it at home for less :) This is one of my favorites pasta dishes, mildly sweet with a little heat :) Here's what I did...
 Sweet-n-Spicy Pasta Salad
1 (16 oz.) box Penne Pasta, cooked as directed & cooled
1 (24 oz.) bag John Soules Food Chicken Fajitas Strips , thawed
1 cup sweet bell pepper, thinly sliced (I used mini sweet peppers)
1 (16 oz.) bottle Wish Bone Light Sweet & Spicy French (I used 3/4 of the bottle)
1 tablespoon garlic, minced
2 tablespoons olive oil
1 tablespoon Frank's Red Hot or Sriracha Sauce
1/2 teaspoon Salad Supreme Seasoning
1 tablespoon red wine vinegar, optional
2 tablespoon onion, finely chopped
2 medium tomatoes, diced
2 small zucchini, sliced, blanched, & dried
Salt & Pepper, to taste; if desired
In a large bowl mix pasta, chicken strips, and peppers together.
In medium bowl mix together dressing, garlic, oil, sauce, seasoning, vinegar, and onion. Pour over pasta mixture, cover and refrigerate for at least 2 hours. (Best if refrigerated overnight.)
Sweet-n-Spicy Pasta Salad
1 (16 oz.) box Penne Pasta, cooked as directed & cooled
1 (24 oz.) bag John Soules Food Chicken Fajitas Strips , thawed
1 cup sweet bell pepper, thinly sliced (I used mini sweet peppers)
1 (16 oz.) bottle Wish Bone Light Sweet & Spicy French (I used 3/4 of the bottle)
1 tablespoon garlic, minced
2 tablespoons olive oil
1 tablespoon Frank's Red Hot or Sriracha Sauce
1/2 teaspoon Salad Supreme Seasoning
1 tablespoon red wine vinegar, optional
2 tablespoon onion, finely chopped
2 medium tomatoes, diced
2 small zucchini, sliced, blanched, & dried
Salt & Pepper, to taste; if desired
In a large bowl mix pasta, chicken strips, and peppers together.
In medium bowl mix together dressing, garlic, oil, sauce, seasoning, vinegar, and onion. Pour over pasta mixture, cover and refrigerate for at least 2 hours. (Best if refrigerated overnight.)
 Remove from refrigerator, add tomatoes and zucchini slices.
 Refrigerate for 30 minutes to 1 hour, served. Season with salt and pepper, if desired.
ENJOY! Come again...
Linked to:
Foodie Fridays @ Designs By Gollum
Foodie Friday @ Simple Living
The Country Cook:: Weekend Potluck
Tried and True Recipe Party 3
Refrigerate for 30 minutes to 1 hour, served. Season with salt and pepper, if desired.
ENJOY! Come again...
Linked to:
Foodie Fridays @ Designs By Gollum
Foodie Friday @ Simple Living
The Country Cook:: Weekend Potluck
Tried and True Recipe Party 3
Sheet Pan Crackers: My Way
Hi everybody :)
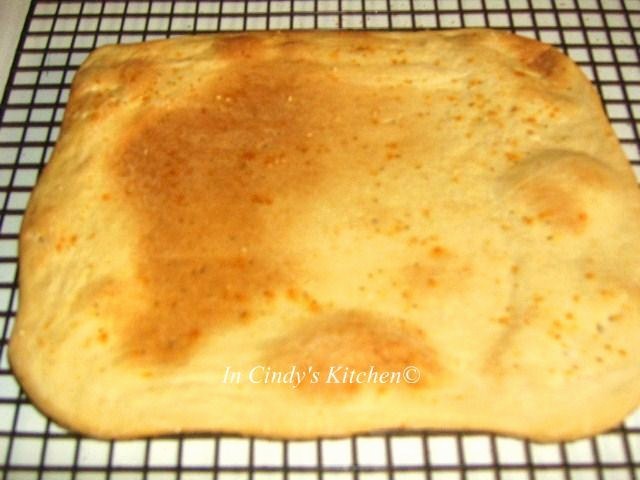
I was in the mood for homemade crackers yesterday; and discovered this recipe in my cookbook. The crackers was designed to be cooked on inverted sheet pans, hence the name, Sheet Pan Crackers. Being too delicate and super-thin the dough would stick to parchment paper the standard solution for a tricky dough. But I thought I could do it my way and use the Silpat for Bread without any problems. So here's what I did...
Sheet Pan Cracker w/ Sea Salt & Salad Supreme Seasoning
 Sheet Pan Crackers
1 3/4 - 2 cups (8 1/4 to 10 ounces) all-purpose flour
1 tablespoon extra-virgin olive oil, plus extra for brushing
1 tablespoon honey
1/2 teaspoon instant or rapid yeast
1/2 teaspoon table salt
1/2 cup warm water (110 degrees)
2 teaspoons poppy, sesame, rye, and/or flax seeds (optional) Coarse sea salt or kosher salt, for sprinkling
1. Combine 1 3/4 cups of the flour, oil, honey, yeast, and table salt in a standing mixer fitted with the dough hook. With the mixer on low speed, add the water and mix until the dough comes together, about 2 minutes.
2. Increase the mixer speed to medium-low and knead until the dough is smooth and elastic, about 8 minutes. If after 4 minutes more flour is needed, add the remaining 1/4 cup flour, I tablespoon at a time, until the dough clears the sides of the bowl but sticks to the bottom .
3. Turn the dough out onto a lightly floured counter and knead by hand to form a smooth, round ball. Place the dough in a large, lightly oiled bowl and wrap tightly with greased plastic wrap. Let rise in a warm place until doubled in size, 1 to 1/2 hours.
4. Divide the dough into 2 equal pieces, and cover with greased plastic wrap. Working with one piece of dough at a time (keep the other piece covered), press, the dough into a small rectangle, place on silpat and roll out to rectangle shape about 1/8 inch thick. Place silpat with dough on baking sheet pan. (For those of you who do not have a silpat
step #4 is below; for baking on inverted sheet pans.)
 Cover the dough with a clean kitchen towel and let rest for 10 to 20 minutes. Repeat with the remaining dough.
5. Adjust the oven racks to the upper-middle and lower-middle positions and heat the oven to 350 degrees. Brush the crackers with oil and sprinkle with the seeds (if using) and coarse sea salt. Bake until golden brown minutes, switching
and rotating the baking sheets halfway through baking.
 6. Let the crackers cool on the baking sheets for at least 15 minutes, then break into large pieces and serve.
Sheet Pan Crackers w/ Sea Salt & Garlic Seasoning
Variation:
Cheesy Sheet Pan Crackers
Since the cheese itself is salty, use a light hand when sprinkling the coarse over the before baking.
Sprinkle 1/4 cup grated Parmesan or Asiago cheese over the top of each sheet of crackers before baking.
6. Let the crackers cool on the baking sheets for at least 15 minutes, then break into large pieces and serve.
Sheet Pan Crackers w/ Sea Salt & Garlic Seasoning
Variation:
Cheesy Sheet Pan Crackers
Since the cheese itself is salty, use a light hand when sprinkling the coarse over the before baking.
Sprinkle 1/4 cup grated Parmesan or Asiago cheese over the top of each sheet of crackers before baking.
To Make Ahead:
In step 3. do nor let the dough rise but refrigerate it overnight or up to 16 hours; let the dough sit at room temperature for 30 minutes then continue with step 4.
Step #4 : For Cooking on Inverted Pan:
1.Working with one piece of dough at a time, press the dough into a rough rectangle, then transfer to an inverted, (the bottom side) lightly greased baking sheet. Using a rolling pin, roll the dough out as far as you can to the edges of the pan.
2 Using your finger, gently stretch the dough to the edge of the pan. If the dough snap back from the edge, let it rest for a few minutes and try again.
3. Brush the dough lightly with olive oil and sprinkle coarse salt and seeds (if using).
4. After
the crackers have been baked and cooled, gently break them into large rustic pieces.
Source: The America's Test Kitchen Family Baking Book
What I Think:
Baking the crackers on the silpat was a GREAT idea. I just peeled the crackers off when cooled. They were crispy and delicious. I think I love the taste of these better than the Homemade Crackers I did before. I really love the rustic look of them too. By breaking these up into large pieces, instead of having to roll out and shape, is an added bonus for making these crackers a great REPEAT.
ENJOY! Come again...
Linked to:
YeastSpotting! @ wildyeast
Bizzy Bake Recipe Box
Show and Share Wednesday Semi-Homemade Mom
Full Plate Thursday @ Miz Helen's Country Cottage
The Mandatory Mooch Tasty Thursday
Food-Tastic Fridays @ Not Your Ordinary Recipes
Roxana's Home Baking: March Bake Your Own Bread
Roasted Chicken w/ Caramelized Onions Soup
Hi everybody :)
I was hoping with the arrival of March the weather would be a little bit warmer, but to no avail, it seem to be colder then ever. What's for dinner when it too cold outside and you want something quick and easy to warm your inside? Soup! This brings me to today post, Roasted Chicken with Caramelized Onions Soup, made with Swanson® Chicken Broth (so it would seem as if you work hard preparing it all day; sshhh your secret is safe with me) and roasted chicken that can be purchased at your local deli or homemade :) Let's get it started...
Roasted Chicken with Caramelized Onions Soup
2 teaspoons vegetable oil
2 medium onions, cut in half and thinly sliced (about 1 cup)
8 cups Swanson® Chicken Broth (Regular, Natural Goodness® or Certified Organic)
1/8 teaspoon ground black pepper
Pinch salt
2 medium carrots, peeled and sliced (about 1 cup)
2 stalks celery, sliced (about 1 cup) (omitted, used 1/4 tsp. celery seeds)
3/4 cup uncooked Campanella pasta (I used penne pasta)
1 tablespoon butter
2 cups roasted chicken cut into strips (I used deli chicken breast)
Heat the oil in a 10-inch skillet over medium-high heat. Add the onions and cook until they begin to brown, stirring occasionally.
Reduce the heat to medium. Cook until the onions are tender and caramelized, stirring occasionally. Remove the skillet from the heat.
Heat the broth, black pepper, carrots and celery in a 4-quart saucepan over medium-high heat to a boil.
Stir the pasta and chicken in the saucepan. Reduce the heat to medium. Cook for 10 minutes or until the pasta is tender.
Stir in the onions and serve immediately.
Source: Campbell's Kitchen
What I Did and/or Think:
The changes I made are in Bold, Italic, & Purple.
The Taste: I love, love, love this soup! Don't skip on caramelizing the onions, it adds lots of flavor. Definitely an A.G.R. (Another Great REPEAT).
ENJOY! Come again...
Linked to:
Recipe Sharing Monday @ Jam Hands
Melt In Your Mouth Monday @ Make Ahead Meals for Busy Moms
Flour Me With Love: Mix it up Monday!
Watch Out Martha
The Chicken Chick: Clever Chicks Blog Hop
Tuesday-Talent-Show: Chef In Training
Two Cup Tuesday
Titus 2 Tuesday
Show Case Your Talent @What's Cooking Love
Cheesy Ham & Tots Casserole: Breakfast Is Served
Hi everybody :)
"Welcome
to another Breakfast Is Served Sunday!" If you're just tuning in to my
post, every Sunday I try to post a Breakfast Is Served. Cappuccino Muffins were the last post. Today is the first breakfast post for the month of March. To kick it off to a great start introducing Cheesy Ham & Tots Casserole. The original recipe used hash brown but I figured tater tots would be fine; so here's what I did...
Cheesy Ham and Hash Brown Casserole
1 (32 ounce) package frozen hash brown potatoes (I used Onion Tater Tots; cut into pieces)
8 ounces cooked, diced ham
2 (10.75 ounce) cans condensed cream of potato soup
1 (16 ounce) container sour cream
2 cups shredded sharp Cheddar cheese (I used Colby & Monterey Jack Cheese)
1 1/2 cups grated Parmesan cheese (I omitted this)
(1 tbsp. sweet red pepper)
(1 tbsp. chives, divided 1 tsp. into the casserole & 2 tsp. sprinkled over top)
Preheat oven to 375 degrees F (190 degrees C). Lightly grease a 9x13 inch baking dish.
In a large bowl, mix hash browns, ham, cream of potato soup, sour cream, and Cheddar cheese.
Spread evenly into prepared dish.
 Sprinkle with Parmesan cheese. (Colby & Monterey Jack Cheese)
  Bake 1 hour in the preheated oven, or until bubbly and lightly brown.
Serve immediately.
Source: Allrecipes
Bake 1 hour in the preheated oven, or until bubbly and lightly brown.
Serve immediately.
Source: Allrecipes
 What I Did and/or Think:
Since I'm home alone I only did a small serving of this recipe; baking it in a small casserole dish for 25 minutes. The other changes are in Bold, Italic, & Purple.
The Taste: The casserole had a great blend of flavors and was delicious. Definitely an A.G.R. (Another Great REPEAT).
I think this would make a great lunch or dinner meal also.
ENJOY! Come again...
Linked to:
What I Did and/or Think:
Since I'm home alone I only did a small serving of this recipe; baking it in a small casserole dish for 25 minutes. The other changes are in Bold, Italic, & Purple.
The Taste: The casserole had a great blend of flavors and was delicious. Definitely an A.G.R. (Another Great REPEAT).
I think this would make a great lunch or dinner meal also.
ENJOY! Come again...
Linked to: