Search This Blog

Saturday, September 1, 2012

Easy Shrimp Dip: A Heartfelt Thank You

Easy Shrimp Dip: A Heartfelt Thank You


Hi everybody :)

First, I like to take this time to welcome my followers. I really appreciate the love. Some of you have been with me from the very beginning, when I didn't have anything posted because I didn't know what I was doing. I'm still learning, so please be patience with me. It warms my heart and keep me going, reading the comments and encouraging words from you. A heartfelt thanks goes out to you. I hope I can continue to bring you culinary delights from my kitchen and crafty projects too. (I'm getting to the crafting soon, still trying to get the hang of things) Thank you, thank you, thank you...

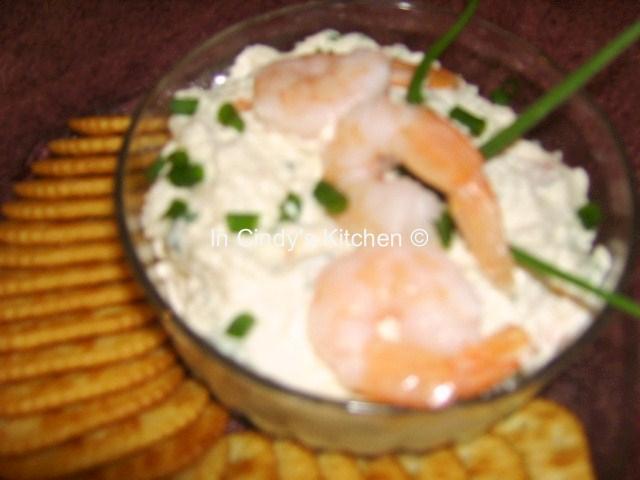
Now for the recipe... if you're doing some entertaining this weekend and need a quick appetizer to serve, then this might be for you...from my cookbook collection Easy Shrimp Dip.

Easy Shrimp Dip adapted Calling All Cook Three


Ingredients
8 ounces cream cheese, softened
1/2 cup mayonnaise-style salad dressing
1/8 teaspoon garlic salt
1  4-ounce can small shrimp drained, rinsed (I used about 6 ounces of cooked medium shrimps)
1/3 cup finely chopped green onions
(I added 1/2 teaspoon Mrs. Dash Onion and Herb Seasoning.)


Directions
Combine cream cheese and salad dressing in bowl; mix well. Stir in garlic salt, shrimp and green onions. Chill, covered, overnight Serve with fresh vegetables or assorted crackers. May omit garlic salt
Yield: 12 servings


What I Did and/or Think:
Being a dip, it is best made the night before serving,  but I was in a hurry and let it set in the refrigerator for about 2 hours. As you can also see from the picture of the ingredients, I made a few changes to the recipe. I didn't have canned shrimps, so I used about 6 ounces of cooked medium shrimps. I Love Shrimp! I also added 1/2 teaspoon Mrs. Dash Onion and Herb Seasoning. I used Town House Crackers to served it, and garnish it with extra shrimps and green onion.  This was really, really great, so IT A REPEAT!

BTW, It will not be a Breakfast Is Served post tomorrow. It will be back the following week. Have a great weekend. :)


ENJOY! Come again....

Linked to:
Show and Tell Saturday: Be Different...Act Normal 
Appetizer Round-Up and Your Best Party Recipes Blog Hop 
Six Sisters' Stuff: Strut Your Stuff Saturday Link Party Week 60
Friday, August 31, 2012

Apple Brownies: Welcoming Fall

Apple Brownies: Welcoming Fall


Hi everybody :)

Fall time is near..
The smell of apples and cinnamon are in the air..
Colorful leaves are everywhere ...
Hooray! Hooray! 
Lets give a cheer..
Because Fall time is near...

I decided the open up today post with a little poetry penned by yours truly. Fall is my favorite season. I love everything about it, the cool crisp air, the colorful leaves, the smell of cinnamon in fresh baked goods.

Today recipe, from my collection, is perfect for Fall; Apple Brownies, doesn't the name just scream Fall.  Well, lets get it started; shall we...

Apple Brownies adapted  Calling All Cooks


Ingredients
1/2 cup  (1 stick)  margarine ( I used butter)
1 cup sugar
1 egg
1 cup flour
1/2 teaspoon baking powder
1/2 teaspoon salt
1/2 teaspoon cinnamon
1 cup cut up apples ( I used 1 large Granny Smith)
1/2 cup walnuts or pecans

Cream margarine and sugar; add egg.
Butter, Sugar, & Egg


Next add dry ingredients,
Adding Dry Ingredients


 then apples and nuts.
Adding Apple


Adding Nuts


 Pour into greased 8 inch square pan; bake 40-50 minutes at 350°.
Uncooked


 Cool, then cut into squares.
Cooked


Cut Brownie


What I Think:
First I have to say, they smell soooo good. The whole house smells of apple and cinnamon. The brownies were moist, chewy, and DELICIOUS! OH BOY! IT"S ANOTHER REPEAT!!!  You must make these brownies, you're going to thank me for it later..


ENJOY! Come again...

Linking to
Tidy Mom's I'm Loving It Party   
Rattlebridge Farm's Foodie Friday 
Linky Party, Pity Party 103 
While He Was Sleeping: Weekend Wander # 94
 Comfy in the Kitchen Friday's Favorites 
Simply Designing's Simply Link Party 
Six Sisters' Stuff: Strut Your Stuff Saturday Link Party Week 60
Sweets for Saturday @ Sweet As Sugar Cookies
The Better Baker Weekend Potluck
Fall Favorites Link Party

Fall Favorites Link Part
Fall Favorites Link Party

Thursday, August 30, 2012

Peaches & Cream Cheesecakes

Peaches & Cream Cheesecakes 

Hi everybody :)

When I saw this recipe on Jane's blog, I knew it would be great make ahead dessert. She also have it in her cookbook, I'm so glad I won a copy.

I wanted something peachy for another peach post in August. It's pitiful to have only one peach recipe for Peach Month so I  played around with the flavor of this recipe a little.  I used a gingersnap crust because it would go so well with the peach schnapps and preach preserve. I also downsized the recipe for my small family, so feel free to double it.

Peaches & Cream Cheesecakes adapted from Make Ahead Meals for Busy Moms

Ingredients


The Crust:
1/2 cup plus 2 tablespoons gingersnap, crushed
2 tablespoons sugar
1/2  teaspoon cinnamon
Pinch salt (not in picture)
2 tablespoons butter, melted


The Filling:
1 (8 oz.) package cream cheese, softened
1 tablespoon peach schnapps
1 large egg
1 tablespoon fresh lemon juice
1/4 cup sugar

Topping:
Peach Preserve or Peach Jam

A Day Ahead
1.  Preheat the oven to 350°F.  Line 6 jumbo muffin cups with paper baking cups.  Set aside.

2.  In a small bowl, mix the gingersnap crumbs, 2 tablespoons sugar, cinnamon, salt, and melted butter.
Crumb Mixture


Reserve 2 tablespoons of crumb mixture for garnish, set aside.  Place 2 tablespoons of the crumb mixture in each muffin cup.  Press down on the crumbs with something flat to form a  crust.  Set aside.


3.  In a large mixing bowl, beat the cream cheese until fluffy.  Add the peach schnapps, eggs, lemon juice, and sugar, and beat until smooth. 
Filling Mixture


 Fill each baking cup with about 3-4 tablespoons of the cheesecake mixture. 
Uncooked


Bake the cheesecakes for 17 – 19 minutes or until they start to crack on the surface.  Cool the cheesecakes in the muffin pan for 5 minutes, then remove to a wire rack. NOTE: They will fall in the center slightly while cooling.

Cooked


4.  Place the cooled cheesecakes (with the paper liners still on them) in a covered container and refrigerate overnight.


Before Serving
Remove the paper liners and top each cheesecake with 2 tablespoons of peach preserve and sprinkle with reserved crumb mixture. Keep covered and refrigerated.

Makes 6 jumbo muffin cheesecakes


What I Think:
They were SSSSOOO DELICIOUS!!! The creamy filling, the gingersnap crust; MAGNIFICENCE! The flavors blended together perfectly. Make sure to use a fruity jam or preserve with this, I used Smucker's Peach Preserve, great choice.  You all know what this means.... IT'S A REPEAT and REPEAT and REPEAT...!

You can really play with the flavors of this recipe the original call for a graham crackers crust and cherry or strawberry pie filling for the topping.

If you like a more traditional look with a Sour Cream Topping, try this recipe, it can be doubled; from my cookbook collection:

For the Sour Cream Topping  adapted from Calling All Cooks
1/2 cup sour cream
2 tablespoon sugar
1/4 teaspoon vanilla
Smucker's preserves or jams

Mix all the ingredient except preserves or jams. Spread a small amount on top of each cup. Put back in oven and bake 5 minutes longer. Then remove, cool, refrigerate overnight, and top with preserves or jams when ready to serving.


ENJOY! Come again....

Linked to  
Something Swanky's Sweet Treats and Swanky Stuff Link Party
Bizzy Bake Recipe Box # 12 ,  
Creative Juice Thursday #87 @ Momnivore's Dilemma
Full Plate Thursday 8-30-12  @ Miz Helen's Country Cottage 
Somewhat Simple Link Party Thursday

Show You Talent Thursday # 22 
Six Sisters' Stuff: Strut Your Stuff Saturday Link Party Week 60 
Sweets for Saturday @ Sweet As Sugar Cookies 

Wednesday, August 29, 2012

Herb-Coated Tilapia

Herb-Coated Tilapia


Hi everybody :)

I wanted to do a fish recipe today dealing with tilapia. I love tilapia, but my favorite fish is salmon.

One of major peeve is overcooked salmon. It got to be just right, tender, juicy pink flakes of fish.YUM! I looovvvvvve the way hubby cook it. He surprise me one anniversary, when I was too sick to go out and made a wonderful salmon dinner for us. IT WAS  DIVINE; at times he can really throw down in the kitchen. Ladies, there's nothing more sexy than a man who can cook and clean up afterwards. Uh.. uh.. uh... Well, enough about that, I don't want to be accused of over-sharing :)

While searching through my cookbook collection I came across this simple recipe and decided to give it a try.

Herb-Coated Tilapia adapted from Taste of Home Cookbook


Ingredients
1/4  cup butter, melted
2/3  cup crushed butter-flavored crackers
2  tablespoons grated Parmesan cheese
1/2   teaspoon dried oregano
1/2  teaspoon dried basil
1/4  teaspoon garlic powder
1  pound tilapia fillets

 Directions

1) Place butter in a shallow bowl. In another bowl, combine the crackers, cheese and seasonings.
Crumb Mixture


Dip fillets in butter, then coat with crumbs.
Fish in Butter


Fish Uncooked


2) Place in a greased 13-in. x 9-in. x 2-in. baking  dish. Bake, uncovered, at 400° for 15-20 minutes
or until fish flakes easily with a fork.

Yield: 4 servings.
Cooked Fish


What I Did  and/or Think :
The original recipe use cod fillets, but I decided to use tilapia because that's what I had. This turn out to be really good. I did had to press down hard to get the coating to adhere to the fish, so maybe I'll try it next time with egg white in with the butter. I think I'll also play around with the flavors some more, so this is a repeat.


ENJOY! Come again.....

Linked to: 

Milk & Cuddles Mommy Club Link Up
Bizzy Bakes Recipe Box 

Tuesday, August 28, 2012

Easy Cheesy Mac & Cheese

Easy Cheesy Mac & Cheese

Hi everybody :)

I would like to share the Eeesssssssasy Mac and Cheese Dish ever! The sauce is what make this so easy. I use Southwestern Mills Cheddar Cheese Sauce Mix, if you can not find it in your area go here. I LOVE this sauce. I talked about it once before here.

This make THE CREAMIEST AND CHEESIEST MAC & CHEESE. The next time you make mac & cheese try this one, you won't regret it, I promise.


What You Need:
1 pound (16 ounces) Macaroni Noodles
1 package Southwestern Mills Cheddar Cheese Sauce Mix
1/2 cup Sour Cream
Shredded Cheddar Cheese
Cheese-Flavored French Fried Onion

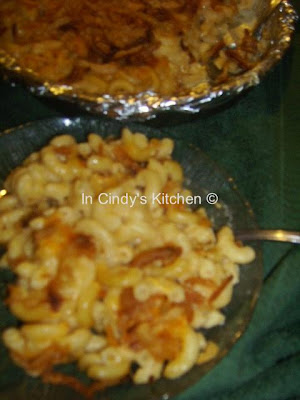
Cook noodles according to package. Drain all but 1/2 cup of water. Measure 1cup cold water to mix with sauce mix, mix well and add to noodles along with sour cream, 1/2 cup cheddar cheese and 2 tablespoons butter. Mix well, pour into a greased casserole dish or foil-lined pan. Top with extra cheese and fried onions.

Bake at 375 until golden brown on top and cheese is heated through about 25 minutes.
Before Baking


BTW,  I'm not being paid by Southwestern Mills producers to say this about their product, this is my own opinion.

ENJOY! Come again...

Shared with: 
Chef In Training's Tuesday Talent Show # 51 
 Milk & Cuddles Mommy Club Link Up

Monday, August 27, 2012

Banana Pudding with Vanilla Wafer Crumble

Banana Pudding with Vanilla Wafer Crumble


Hi everybody :)

One of my favorite dessert is banana pudding. I love it with lots of cookies in the pudding. Homemade pudding is the best, instant is okay too, but hubby refuse to eat it. He can be picky at times :)

While browsing in the library one day, I saw this cookbook called Dam Good Sweet so I just had to check it out. I'm so glad I did. I stumbled across this recipe for banana pudding. It sounded very interesting because they crumbled the wafers and coated them in a cinnamon-sugar mixture before adding it to the pudding, just reading this got me all excited, so I knew I had to try it. Well; here we go...

Banana Pudding with Vanilla Wafer Crumble adapted from Dam Good Sweet


The Pudding
5 large egg yolks
1/2 cup sugar
1/4 cup cornstarch
1/4 teaspoon salt
2 cups whole milk
3 tablespoons banana liqueur (or 1 teaspoon banana flavoring)
2 teaspoons vanilla extract
2 tablespoons unsalted butter
2 ripe bananas


The Crumble
1 cup vanilla wafers (about 15 cookies)
2 teaspoons sugar
1/4 teaspoon ground cinnamon
Pinch salt
1 tablespoon unsalted butter, melted

To Make the Pudding:
Whisk the egg yolks, sugar, cornstarch, and salt together in a medium bowl and set aside. Bring the milk to a boil in a medium saucepan. Remove from the heat and whisk a little at a time into the egg mixture. Once the bottom of the bowl is warm, slowly whisk in the remaining hot milk. Pour the mixture back into a clean medium saucepan (cleaning the saucepan prevents the pudding from scorching), add the banana liqueur, and whisk over medium-low heat until it thickens, about 2 minutes. Cook while constantly whisking until the pudding is glossy and quite thick, 1 1/2 to 2 minutes longer. Transfer the pudding to a clean bowl.
Pudding Mixture


Add the vanilla and butter and gently whisk until the butter is completely melted and incorporated. Press a piece of plastic wrap onto the surface of the pudding to prevent a skin from forming. Refrigerate for 4 hours.

To Make the Crumble:
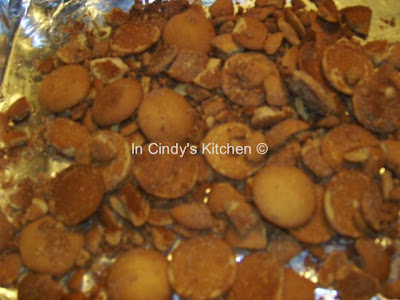
While the pudding sets, heat the oven to 325°F. Line a rimmed baking sheet with parchment paper and set aside. Place the wafers in a resealable plastic bag and seal (make sure there is no air in the bag prior to sealing). Using a rolling pin or a flat-bottomed saucepan or pot, crush the vanilla wafers until they're coarsely ground. Transfer them to a small bowl and stir in the sugar, cinnamon, and salt. Use a spoon to evenly stir in the melted butter, transfer to the prepared baking sheet, and toast in the oven until brown and fragrant, 12 to 15 minutes. Remove from the oven and set aside to cool.
1/2 whole and 1/2 crumbled


To Serve:
Slice the bananas in half crosswise and then slice in half lengthwise so you have 4 quarters. Slice the banana quarters crosswise into 1/2-inch pieces and divide between 6 custard cups or martini glasses (sprinkle with a squeeze of lemon juice if you like—this helps prevent browning). Whisk the pudding until it is soft and smooth, about 30 seconds, and then divide it between the custard cups. Top with the vanilla wafer mixture and serve.  Serves 6


What I Did & Think:
Being the southern girl I am, I triple the crumble mixture, left half of the cookies whole. :) I love a lot of cookies in my pudding. I follow the direction for the pudding mixture.

I  also wanted a whipped topping for my pudding, so I whipped one up. You know, I just had to flavor it with some banana liqueur. The recipe I used is below, make sure to use a cold whip or beater, bowl, and heavy cream. DO NOT OVER WHIP or you will end up with butter instead, whip just until stiffed.

OOOOHHH THE TASTE, THIS IS THE BEST PUDDING EVER!! I love, love, love the crumble mixtures and the pudding was wonderful. I layered this just before serving so that the crumble mixture will stay crisp. Oh my... oh my... oh my... this is definitely a REPEAT.


Whipped Topping
1/4 (2 ounce) package cream cheese, softened
1/4 cup powdered sugar
pinch salt
1/2 teaspoon vanilla extract
1 tablespoon  banana liqueur
3/4 cup heavy cream, cold

Beat cream cheese, powdered sugar salt, vanilla and liqueur until smooth. In a cold mixer with cold whip attachment and cold bowl, whip the heavy cream until stiff peaks form. Fold into the cream cheese mixture.
Refrigerate for about 2 hours before serving. 


ENJOY! Come again....

Shared with:
 Melt In your Mouth Monday Recipe Blog Hop # 80 ,   
Chef In Training's Tuesday Talent Show # 51   
This Week Cravings: Mom's Crazy Cooking 
Flour Me With Love: Mix it up Monday!

Sunday, August 26, 2012

Old World Kolaches - Breakfast Is Served

Old World Kolaches - Breakfast Is Served


Hi everybody :)

Well it's Sunday again, and keeping with my theme; welcome to another Breakfast Is Served Sunday. In case you missed it, Creamy Grits and Perfect Scrambled Eggs were last Sunday breakfast.

While browsing through my collection I came across this recipe. It looked pretty simple and I had all the ingredients, so I thought, why not give it a try...

This recipe is from Land O Lake Treasury of Country Heritage Meals and Menus.  Kolaches also pronounced Kolachi and Kolachkes have both Polish and Czech roots. They are filled pastry-like cookies or buns. The fillings may varies from jams, nuts, cream cheese or poppy seeds. 

Old World Kolaches


1 (1/4 ounce) package active dry yeast
1/4 cup warm water (105 to 115°F)
3 1/4 to 3 1/2 cups all-purpose flour
1/2 teaspoon salt
1 cup butter or margarine, softened
1 cup whipping cream
2 eggs, slightly beaten
1 (10 ounce) jar fruit preserves (see NOTE)

In small bowl dissolve yeast in warm water. In large bowl combine flour and salt; cut in butter until crumbly.
Flour, salt, and butter


Stir in yeast, whipping cream and eggs.
after adding yeast, cream, and eggs


Turn dough onto lightly floured surface; knead until smooth (2 to 3 minutes).
dough before refrigeration


Place in greased bowl; turn greased side up. Cover, refrigerate until firm (6 hours or overnight).
1. Heat oven to 375°.
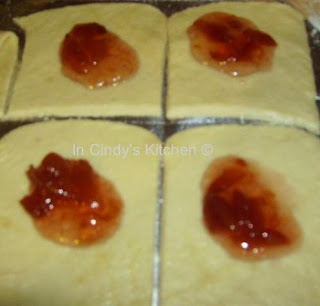
2. Roll out dough, 1/4 at a time, on sugared surface to 1/8-inch thickness. Cut into 3-inch squares. Spoon 1 teaspoon preserves in center of each square
Bourbon Cherry Jam


Peach Jam


Cherry Jam


3. Bring up two opposite corners to center; pinch firmly together to seal.


4. Place 1 inch apart on cookie sheet. Bake for 10 to 15 minutes or until lightly browned.


What I Think:
Despite the fact that dough was a little difficult to work with, these were the MOST delicious pastry biscuit-like things I EVER tasted. The buttery airy pockets, the sweet sugary top....oh boy, oh boy. NOTE: The only thing you should remember when making them is to use a thick jam or filling or it will run off, and  please send me some when your done, hee hee :)


ENJOY! Come again...

I was featured on  Flour Me With Love!

Mixitup


Linked to:
 Yeast Spotting
 Melt In your Mouth Monday Recipe Blog Hop # 80
 Flour Me With Love: Mix it up Monday!

Followers