Search This Blog

Thursday, December 13, 2012

Sourdough French Rolls: Cheesy Garlic French Loaf

Sourdough French Rolls: Cheesy Garlic French Loaf


Hi everybody :)

I'm continuing with my sourdough adventures today. I decided to try out this recipe using the Herman Sourdough Starter , although it's from the The Taste of Home Baking Book.  The recipe was design to make two loaves, but I divided the 2nd dough loaf in half to make two smaller loaves and one big loaf from the 1st. dough half. Here's what I did...
 SOURDOUGH BREAD
Sourdough French Bread

Prep: 15 min. + rising  BAKE: 20 min. + cooling

1   package (1/4 ounce) active dry yeast
1 3/4  cups warm water (110° to 115°)
4 1/4  cups all purpose flour
1/4 cup Sourdough Starter

2 tablespoons vegetable oil
2 tablespoons sugar
2 teaspoon salt

CORNSTARCH WASH:
1-1/2 teaspoons cornstarch
1/2 cup water

1. In a large mixing howl, dissolve yeast in warm water. 

 Add the flour, Sourdough Starter, oil, sugar and salt; mix well.

Turn onto a floured surface; knead gently 20-30 times (dough will be slightly sticky). 
Place in a greased bowl, turning, once to grease top. Cover and let rise in a warm place until doubled, about 1 to 1-1/2 hours.
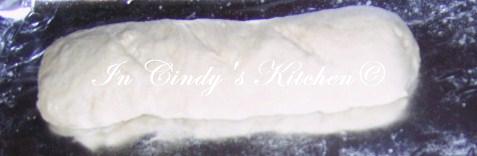
Punch dough down. Turn onto a lightly floured surface; divide in half. 
Roll 1st half portion into a 12-in.X8-in. rectangle. Roll up jelly-roll style, starting with a long side; pinch ends to seal. Place seam side down on two greased baking sheets; tuck ends under. Cover and let rise until doubled, about 30 minutes. Divided 2nd half in halves again and continue shaping into smaller loaves, cover and let rise until double.

3 With a sharp knife, make four shallow diagonal slashes across the top of each loaf. In a small saucepan, combine cornstarch and water until smooth. 

Cook and stir over medium heat until thickened.  Brush some over loaves. Bake at 400° for 15 minutes. Brush loaves with the remaining Cornstarch wash. I only use the cornstarch wash on the bigger loaf (see how shiny it look below).  Bake 5-10 minutes longer or until lightly browned. Remove from pans to wire racks to cool.
 I made Cheesy Stuffed Garlic French Bread with the bigger loaves, I'm going to make sandwiches with the two smaller loaves. The Cheesy Garlic French Loaf was DELICIOUS!!! REPEAT!
 Stay tuned for the sandwiches :).


ENJOY! Come again...

Turkey or Chicken Club Sandwiches


For a healthier version try :
Honey Wheat Sourdough Rolls 


Linked to:
BYOB @ girlichef: BYOB - Bake Your Own Bread 
YeastSpotting! @ wildyeast 
Show Case Your Talent  @What's Cooking Love 
Somewhat Simple Link Party Thursday 
Carole's Chatter: Garlic Recipe Links Food Friday
 

Wednesday, December 12, 2012

Caramelized Onions Cheese & Chive Sourdough Biscuits

Caramelized Onions Cheese & Chive Sourdough Biscuits


Hi everybody :)

I'm been missing posting these pass couple of days because I've have these back pains, and the pain medication makes me drowsy. I hate been unable to do anything :(  I'm feeling a little better now, so on with my post. 

I been working on my sourdough experiments, whenever I was not laying down because of the pain. This recipe idea came from a King Arthur magazine. They had a picture of these caramelized onion sourdough biscuit using their starter mixture.  When I saw the Golden Sourdough Biscuit recipe in TOH, I adjusted it to make these biscuits. 

Caramelized Onions Cheese & Chive Sourdough Biscuits
Golden Sourdough Biscuits  adapted The Taste of Home Baking Book
Ingredients


2 cups all-purpose flour
1 teaspoon baking powder
1 teaspoon salt
1/2 teaspoon baking soda
1/2 cup cold butter
1/2 cup buttermilk
1 cup Sourdough Starter (at room temperature)
Sourdough Starter - Taste of Home 
Additional butter, melted

Additional Ingredients

1 Onion, small; sliced thinly about 1/4 cup
1 tablespoon brown sugar
2 teaspoons butter
2 tablespoons Chives
1/3 cup Cheddar Cheese

In a small saucepan, place butter, brown sugar, and onion over medium heat. Stirring until butter melt and sugar dissolved, reduce heat to low. 
 Cook for about 20 minutes, covered until onions are golden brown.  Set aside to cool.
In a bowl, combine the flour, baking powder, salt and baking soda; cut in butter until mixture resembles coarse crumbs. Add the additional ingredients with the caramelized onions. 
 Combine Sourdough Starter and buttermilk; stir into crumb mixture with a fork.
Turn onto a well-floured surface; knead 10-12 times. Roll to 1/2-in. thickness. 
Cut with a floured 2 1/2-in biscuits cutter. Place 2 in apart on a grease baking sheet.
Bake at 425° for 12 to 15 minutes or golden brown. Yield: about 1 dozen. Brush tops with melted butter. Remove from pan, cool on wire rack.
What I Did and/or Think:

The changes I made are in Bold, Italic and Purple.
The Taste: I love the savory flavor of the biscuit. The caramelized onions added a little sweetness, the cheese and chives blended well together. They smelled delicious while cooking too, which is always a plus :). 


I thought the biscuit would be perfect with sliced ham, so I made ham sandwiches, using deli ham, cheddar cheese, and honey mustard. DELICIOUS! REPEAT!


ENJOY! Come again...

 I've been featured on Bizzy Bakes!
Recipe Box


AND


Miz Helen’s Country Cottage


Linked To:
YeastSpotting! @ wildyeast 
BYOB @ girlichef: BYOB - Bake Your Own Bread
Bizzy Bake Recipe Box
Wednesdays Adorned From Above   
{Wow Me Wednesday} @Ginger Snap Crafts
Show and Share Wednesday Semi-Homemade Mom 
The Mandatory Mooch Tasty Thursday 
Full Plate Thursday @ Miz Helen's Country Cottage 

Monday, December 10, 2012

Sourdough Starter # 2: How To

Sourdough Starter # 2: How To


Hi everybody :)

Well, this is starter # 2, this recipe is very similar to the Herman Sourdough starter but does  not include sugar, salt, or milk in the starter mixture. It's adapted from The Taste of Home Baking Book  and take only 2 days to ferment whereas the Herman starter take 3 days.

Sourdough Starter                                                                Starter Food (see key steps)
 

PREP: 10 min. + standing YIELD: about 3 cups                    1 part water
1 package (4 ounce) active dry yeast                                       1 part flour
2 cups warm water(110°to 115°)
2 cups all- purpose flour                                                           

In a large mixing bowl, dissolve yeast in warm water;  let stand for 5 minutes. 

 Add flour; stir until smooth. 
Cover loosely with a clean towel. Let stand in a warm place (80°- 90°) to for 48 hours; stir several times daily (the mixture will become bubbly and rise, have a yeasty sour aroma and a transparent yellow liquid will form on the top).
Use starter for your favorite sourdough recipes. Refer to the key steps in maintaining your starter.

Making a starter is pretty basic and simple. The main key steps are: 

Key Steps for a Successful Starter
1.  Prepare your starter in a sterilized non-metal container.  Starters contain acid that can react with metal. Use a large sterilized container made of glass, ceramic or plastic, because starter increase in volume and a small container will overflow.

 2.  To use, bring starter  to room temperature (80° to 90°) (2 -12  hours); this could take hours so plan ahead. After using, replenish, feed, or nourish the starter by using equal amounts of starter food to restore the volume (in this case use equal parts of water and flour) (For example, if 1/2 cup starter was removed for a recipe, combine 1/2 cup all-purpose flour and 1/2 cup warm water. Stir into starter.) Let starter stand in a warm place (80° to 90°) until light and bubbly, stir starter cover and refrigerate. (This could take hours also.)

3.  Store starter in refrigerator. If starter is not use in 2 weeks, it need to be feed to keep active, To nourish, remove half of the starter and share with a friend or discard. Move remaining starter to a large bowl, add equal parts water and flour and repeat the latter part of step #2
 
4.  If used and replenished or nourished at least once every 2 weeks, the starter should remain active indefinitely.

5. Starter should have a yeasty sour smell. Discard a starter if it develops an offensive odor, changes color or becomes slimy or Stringy, which means it's spoiled. Sterilize the storage container before using it for a new batch of starter.

I will be sharing what I made with this starter recipe soon, so stay tune :)


Feeding the starter


 Starter after feeding


What I think:
Although this experience was a bit tiresome with the days and hours of waiting, the results was well worth it. "NO PAIN, NO GLORY!"

ENJOY! Come...

Linked to:  

Followers