Search This Blog

Showing posts with label Bread. Show all posts

Sunday, March 10, 2013

Jumbo Sour Cream Cinnamon Buns: Breakfast Is Served

Jumbo Sour Cream Cinnamon Buns: Breakfast Is Served


Hi everybody :) 
"Welcome to another Breakfast Is Served Sunday!" If you're just tuning  in to my post, every Sunday I try to post a Breakfast Is Served. Cheesy Ham & Tots Casserole was last week post. 

Today I'm doing cinnamon buns. These buns have a soft, velvety texture of the Sour Cream Pocketbook Rolls, because they too, are made using sour cream. They're rolled up jellyroll-styled and place in muffin tins after cutting. I decided to make them jumbo because I like big buns :) no pun intended. Let's get it started... 
 Sour Cream Cinnamon Buns
1 8-ounce carton sour cream
2 tablespoons butter or margarine
3 tablespoons sugar
1/2 teaspoon salt
1/8 teaspoon baking soda
1 large egg, lightly beaten
1 package active dry yeast
3 cups all-purpose flour, divided
2 tablespoons butter or margarine, softened
1/2 cup firmly parked brown sugar
2 teaspoons ground cinnamon
1 1/2 cups sifted powdered sugar
2 tablespoons milk

Heat sour cream in a small saucepan over medium-low heat to 105° to 115°. 

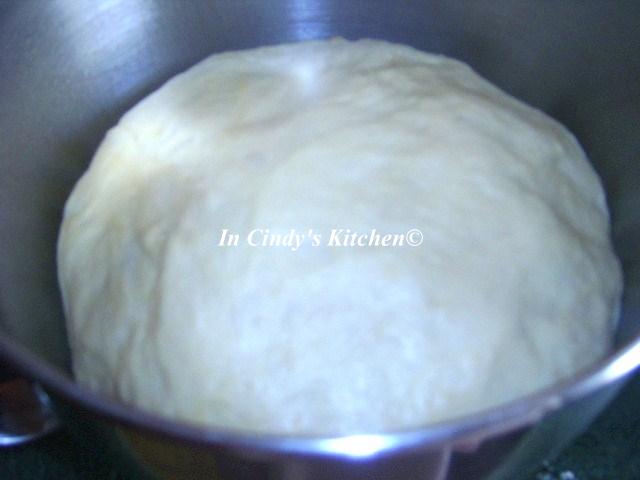
In a large mixing bowl, combine warm sour cream, 2 tablespoons butter, and next 3 ingredients. 
 Add egg and yeast; blend well. 
Add 1 1/2 cups flour; beat at medium speed of an electric mixer until well blended. 
Gradually stir in enough remaining 1 1/2 cups flour to make a soft dough.
Turn dough out onto a lightly floured surface, and knead lightly 4 or 5 times.
Cover and let rest 5 minutes.
Roll dough into an 18- x 6-inch rectangle; (I roll out to about 14-x 8-inch) 

spread 2 tablespoons softened butter over dough. Sprinkle brown sugar and cinnamon over dough. 
Roll up dough, starting at long side, pressing  firmly to eliminate air pockets; pinch seam to seal.


Slice roll into 12 (1 1/2-inch) slices. (I did 7 slices {about 2-inch})  Place slices, cut side down, in greased muffin pans. 
Cover and let rise in a warm place (85°), free from drafts, 30 minutes or until doubled in bulk. 
Bake at 375° for 12 to 15 minutes or until lightly golden. Remove buns from pan immediately; let cool on a wire rack. 
Combine powdered sugar and milk: drizzle over buns. Yield: 1 dozen.
Source: Christmas with Southern Living Cookbook: Volume 3

 What I did  and/or Think: 
    The changes I made was making these jumbo size and using a sour cream glaze, recipe below.
    The taste: If you loved the Sour Cream Pocketbook Rolls, then you're going to really love these buns. They have the same texture; fluffy, soft, velvety deliciousness swirled with cinnamon and brown sugar. 
    I wanted a thick glaze with a tangy sweet flavor so I made one this for the topping:
Sour Cream-Cheese Glaze:
1 tablespoon cream cheese, softened

1 tablespoon sour cream 
1/2 cup powdered sugar, sifted
1 - 2 tablespoons milk or cream, enough to make it drizzle Whisk together cream cheese, sour cream and powdered sugar. Add enough milk or cream to make it drizzle. Drizzle over buns. Sprinkle with sliced almonds, if desired.
ENJOY! Come again... 
Linked to:
YeastSpotting! @ wildyeast  
Nifty Thrifty Sunday
Everyday Moms Meals 

Mop Up Mondays - I Should be Mopping the Floor  
Scrumptious Sunday Recipe Link Party  @ Addicted Recipes

Melt In Your Mouth Monday @ Make Ahead Meals for Busy Moms  
Flour Me With Love: Mix it up Monday!  
The Chicken Chick: Clever Chicks Blog Hop 
Watch Out Martha
Tried and  True Recipe Party 3 
The Country Cook:: Weekend Potluck 
Roxana's Home Baking: March Bake Your Own Bread
 

Wednesday, March 6, 2013

Sheet Pan Crackers: My Way

Sheet Pan Crackers: My Way

Hi everybody :)
I was in the mood for homemade crackers yesterday; and discovered this recipe in my cookbook. The crackers was designed to be cooked on inverted sheet pans, hence the name, Sheet Pan Crackers. Being too delicate and super-thin the dough would stick to parchment paper the standard solution for a tricky dough. But I thought I could do it my way and use the  Silpat for Bread  without any problems. So here's what I did...
 

Sheet Pan Cracker w/ Sea Salt & Salad Supreme Seasoning


Sheet Pan Crackers
1 3/4 - 2 cups (8 1/4 to 10 ounces) all-purpose flour
1 tablespoon extra-virgin olive oil, plus extra for brushing
1 tablespoon honey
1/2 teaspoon instant or rapid yeast
1/2  teaspoon table salt
1/2 cup warm water (110 degrees)
2 teaspoons poppy, sesame, rye, and/or flax seeds (optional) Coarse sea salt or kosher salt, for sprinkling

1. Combine 1 3/4 cups of the flour, oil, honey, yeast, and table salt in a standing mixer fitted with the dough hook. With the mixer on low speed, add the water and mix until the dough  comes together, about 2 minutes.

2. Increase the mixer speed to medium-low and knead until the dough is smooth and elastic, about 8 minutes. If after 4 minutes more flour is needed, add the remaining 1/4 cup flour, I tablespoon at a time, until the dough clears the sides of the bowl but sticks to the bottom .
3. Turn the dough out onto a lightly floured counter and knead by hand to form a smooth, round ball. Place the dough in a large, lightly oiled bowl and wrap tightly with greased plastic wrap. Let rise in a warm place until doubled in size, 1 to 1/2 hours.
 4. Divide the dough into 2 equal pieces, and cover with greased plastic wrap. Working with one piece of dough at a time (keep the other piece covered), press, the dough into a small rectangle, place on silpat and roll out to rectangle shape about 1/8 inch thick. Place  silpat with dough on   baking sheet pan. (For those of you who do not have a silpat 
step #4 is below; for baking on inverted sheet pans.)
Cover the dough with a clean kitchen towel and let rest for 10 to 20 minutes. Repeat with the remaining dough.

5. Adjust the oven racks to the upper-middle and lower-middle positions and heat the oven to 350 degrees. Brush the crackers with oil and sprinkle with the seeds (if using) and coarse sea salt. Bake until golden brown minutes, switching
and rotating the baking sheets halfway through baking.

6. Let the crackers cool on the baking sheets for at least 15 minutes, then break into large pieces and serve.

 Sheet Pan Crackers w/ Sea Salt & Garlic Seasoning

 Variation:
Cheesy Sheet Pan Crackers
Since the cheese itself is salty, use a light hand  when sprinkling the coarse over the before baking.
Sprinkle 1/4 cup grated Parmesan or Asiago cheese  over  the top  of each  sheet of crackers before baking.

To Make Ahead:
In step 3. do nor let the dough rise but refrigerate it overnight or up to 16 hours; let the dough sit at room temperature for 30 minutes then continue with step 4.


 Step #4 : For Cooking on Inverted Pan:

1.Working with one piece of dough at a time, press the dough into a rough rectangle, then transfer to an inverted, (the bottom side) lightly greased baking sheet. Using a rolling pin, roll the dough out as far as you can to the edges of the pan.

2 Using your finger, gently stretch the dough to the edge of the pan. If the dough snap back from the edge, let it rest for a few minutes and try again.

3. Brush the dough lightly with olive oil and sprinkle coarse salt and seeds (if using).


4. After the crackers have been baked and cooled, gently break them into large rustic pieces.

Source: The America's Test Kitchen Family Baking Book

What I Think:
Baking the crackers on the silpat  was a GREAT idea. I just peeled the crackers off when cooled. They were crispy and delicious. I think I love the taste of these better than the Homemade Crackers I did before.  I really love the rustic look of them too. By breaking these up into large pieces, instead of having to roll out and shape, is an added bonus for making these crackers a great REPEAT.

ENJOY! Come again...
Linked to: 
YeastSpotting! @ wildyeast  
Bizzy Bake Recipe Box 
Show and Share Wednesday Semi-Homemade Mom
Full Plate Thursday @ Miz Helen's Country Cottage
The Mandatory Mooch Tasty Thursday

Food-Tastic Fridays @ Not Your Ordinary Recipes
Roxana's Home Baking: March Bake Your Own Bread
 

Friday, March 1, 2013

Chicken Pot Pie Casserole: In Need of Comfort Food

Chicken Pot Pie Casserole: In Need of Comfort Food

 
Hi everybody :)
Although Spring is just around the corner, it's been a little too chilly and rainy here for February; now March. I was in need of some serious comfort food. For a quick pick-me-up-   comfort-food-dish, the first thing that came to mind was Chicken Pot Pie. But I didn't want to spend a lot of time preparing a crust, brainstorming, I got it, forget the crust and top it off with a bread. That's where these rolls come into the picture; I was lucky enough to get my hands on a sample pack of Garlic Knots from Wenner Bread. These buttery knots are delicious and only take minutes to brown in the oven. Although they are great on their own, I decided to add some of them to a casserole; a Chicken Pot Pie Casserole. Here's what I did...

The Chicken Filling:
3 boneless/skinless chicken breast, (3-4 cups) cooked and diced
2 cups potatoes, diced and cooked
2 cups frozen vegetable blend, (ie; carrots, peas, corn & green beans)
10 3/4 oz can Cream of Chicken
14.5 oz can Chicken Broth
1/4 cup water + 1 heaping tbsp. corn starch + 2 heaping tbsp. cheese sauce mix (sauce mix; optional)
1 Tbsp. butter, cut into pieces
1/2 tsp. poultry seasoning 
Salt & Pepper; to taste 
The Topping:
12  frozen prebaked Garlic Knots or any frozen rolls will work
1 tbsp. butter
 
Mix all the ingredients together in a large bowl to combine.
Pour in a 13 by 9-inch baking pan or casserole pan.
Place frozen dinner rolls over the chicken filling. (The garlic knots where irregular shape, so I cut these into pieces to fix them into the pan.)
Cover with the rolls and thinly slice 1 Tbsp. butter over the top.
Tent with foil and place in oven.  Bake in a 375 degree oven for 20 -25 minutes; until bubbly. Remove foil and bake minutes longer or until rolls are golden brown.
Let set for about 15 - 20 minutes, and served. 
What I Think: 
The Taste: The casserole was DELICIOUS! The rolls accompany the chicken filling very well in making this dish a hit. Comfort food at it's BEST. REPEAT!

ENJOY! Come again...
Linked to:
Foodie Fridays @ Designs By Gollum 
Foodie Friday @ Simple Living   
The Country Cook.: Weekend Potluck 
Weekend Kitchen Creations 
Finding the Pretty Delicious Linky Party #7
Strut Your Stuff Saturday @ Six Sister's Stuff  

Wednesday, February 20, 2013

Mini Bruschetta Pizzas

Mini Bruschetta Pizzas

Hi everybody :)
Remember the Ciabatta (Mini) loaves  I made a few days ago? I decided to play around with them and make mini bruschetta pizzas. Here's what I did... 

Ingredients 
Ciabatta (Mini) 
Fresh Sliced Mozzarella Cheese
1 bunch Basil, finely chopped
Garlic, minced (I used 1 big elephant garlic)
Tomatoes, seeded and diced
Red Wine Vinegar (not shown)
Extra-Virgin Olive Oil to cover
Salt & Pepper to taste

Combine basil, garlic, a splash vinegar into a small contain with enough oil to cover. Season with salt and pepper. (This can be done ahead of time so the flavors can blend)
Heat oven to 350 F. Brush some of the mixture over the bread to coat. (Refrigerate leftover garlic mixture; great for dressings or marinades.) Top bread with diced seeded tomatoes.
 Slice cheese withe-wise.  Spread cheese slices over the top.
Bake for about 10 minutes or until cheese melt. Sprinkle with extra salt & pepper, if desired, and serve
What I Think:
These were delicious. They can be sliced and served as appetizers or left whole served as snacks. They can also be made with French bread slices, homemade or store-brought. But the homemade version would taste the best :)
ENJOY! Come again....
Linked to:
Bizzy Bake Recipe Box
Show and Share Wednesday Semi-Homemade Mom 
{Wow Me Wednesday} @Ginger Snap Crafts
What I Whipped Up Wednesday @ Sugar and Dots 
Rae Gun Ramblings - What We Wore, Read, and Made Link Party   
Wonderful Food Wednesday  
The Mandatory Mooch Tasty Thursday 
Show Case Your Talent  @What's Cooking Love 
 Full Plate Thursday @ Miz Helen's Country Cottage

Tuesday, February 19, 2013

Sweet-n-Spicy Dr. Pepper Pulled Pork & Hamburger Buns

Sweet-n-Spicy Dr. Pepper Pulled Pork & Hamburger Buns

Hi everybody :)
I'm bringing you two in one today. The recipes I'm sharing are Sweet-n-Spicy Dr. Pepper Pulled Pork and Hamburger Buns. I prepared the pork by slow-cooking it in my  Super Pot, but it can also be adjusted for a regular crock-pot or slow-roasted in the oven like The Pioneer Woman did on her blog. I also played around with the flavors a little. For the buns, I adjusted it by using part wheat flour, olive oil in the place of vegetable  and adding Vital Wheat Gluten, which is optional. I also cut them bigger because I like really big buns :) But it can be prepared just with all-purpose flour like Jane did on her blog. So with the help of two great bloggers, I put together these delicious recipes. Here's how I did it... 
Sweet-n-Spicy Dr. Pepper Pulled Pork
1 cup chopped onion
1 Pork Shoulder Butt (7 - 9 lbs.)
Salt & Pepper
1 teaspoon Lawry's perfect Blend SWEET BASIL, CITRUS & GARLIC RUB 
1 can Dr. Pepper (12 fl. oz)
1/4 cup brown sugar 
Sweet Baby Ray's Sweet n' Spicy BBQ Sauce

Heat the Super Pot to 300 degree (slow-cooking temp). Add the onions. Season the meat with salt & pepper and perfect Blend. Place in pot. Mix soda and brown sugar together, add to the sides of pot. Cover and cook until fork-tender. (This took about 3 hrs and 30 minutes in the Super Pot).
Remove meat from pot and place on a cutting board or work surface. Use two forks to shred meat, discarding the large pieces of fat. Strain as much of the fatty liquid off the top as you can and discard it. Return the shredded meat to the cooking liquid, and keep warm until ready to serve. (Tip: Refrigerate the meat and liquid separately, then remove hardened fat once it's cold.) 
Heat up the liquid and meat on the stove top add the BBQ sauce and serve on buns.(Add a little more Dr. Pepper to thin it out, if desired.)
Variation: Serve on warm flour tortillas. Top with shredded lettuce, diced tomatoes, grated cheese, avocado slices, salsa.  
Source: partly adapted The Pioneer Woman

Now on to the second recipe:

Classic Homemade Hamburger Buns

Hamburger Buns
Ingredients:
3 cups unbleached all-purpose flour and 1 cup whole wheat flour, lightly whisked
1 tablespoon Vital Wheat Gluten 
2  1/4 teaspoons yeast 
1 cup warm water
3 oz. olive oil
1/4 cup granulated sugar
1/2 tablespoon coarse kosher salt

1 ex-large egg, lightly beaten 

In mixing bowl with paddle attachment combine two cups of the flour and yeast on low speed for several seconds. In a medium bowl, stir together the warm water, oil, eggs, sugar, and salt. Add this into the mixer bowl. Beat on low speed for about 30 seconds; stop and scrape the bowl and beaters, then increase the speed to medium and beat for 3 more minutes until smooth.

Remove the mixer bowl from the mixer and stir in the remaining flour by hand. 

If it's extremely soft and still almost liquidity, add in a little more flour, one tablespoon at a time until it seems more workable. (I added 3 tablespoons.) Dump the dough out onto a well floured work surface and knead it until it feels smooth and elastic
Spray cooking spray in a large bowl. Place dough in bowl turning to coat it all over with the oil. Cover the bowl with a sprayed plastic wrap and place the bowl in a warm spot free from draft. Let the dough rise until it's about doubled, perhaps one hour or so. (Because this is a rich dough due to the egg(s) and sugar content it may take a little longer.)
Cover two half-sheet pans with parchment paper or foil. Punch down the dough. On a very lightly floured surface, divide it into three equal portions using a bench knife, or a very sharp chef's knife. Cut each portion into four pieces. (I cut mines into 3 pieces, so I had 9 buns instead of 12.) Cover the pieces with a sheet of sprayed plastic wrap and let them rest for about ten minutes. 
Uncover them and shape each one them into a smooth ball by rolling it in a small circular motion on your work surface, held gently beneath your closed fingers and palm. Tightly pinch closed any seam on the bottom. Place buns on the two half-sheet pans. Press them down into 3 and 1/2 inch circles. 
(I rolled four of them into 8" ropes and tied and tuck them under, the remaining ones I shaped into buns, cut an x on each.)

Cover them again with the sprayed plastic wrap and a light dishcloth and put them in a warm spot. Preheat your oven to 375 degrees, and let the buns rise for about half an hour as the oven heats up.  Brush the top of each one with melted unsalted butter, just before place them in the oven. (I dusted them all with corn meal.

The buns will bake quickly. Peek at them after about ten minutes. Take them out when the tops are golden and the bottoms are deeply golden. (I baked mines for 13 minutes.)

Source: Jane 's Sweets & Baking Journal
What I Thinks:
 It was delicious; the pork, the buns, it all turn out perfect. If you ever decides to make the homemade buns, you would wonder why you buy them. I think they would also make delicious hotdog buns too. I got to try that next :) The pork was super easy to prepare and was great paired with the buns. Sweet but not too sweet with a little spiciness to add some heat :)
ENJOY! Come again...
Linked to: 
Zentmrs: Tuesday Table  
Kathe With an E You're Gonna Love It  
Show Me What You Got Tuesday's at ODH
The Winthrop Chronicles Link Party 
Tuesday-Talent-Show:  Chef In Training  
Show Me What Ya Got 
YeastSpotting! @ wildyeast
BYOB @ Roxana's Home Baking : Baking Your Own Bread
Blooming Homestead: Crafty Tuesday Link Party  

Followers