Search This Blog

Showing posts with label Easy. Show all posts

Thursday, December 9, 2021

Apple Brownies with Boiled Apple Cider Glaze

Hi, this is Patrina, Cindy's daughter, back with the purple. My mom hasn't updated in years, but I wanna encourage her to start blogging again. I even started a little blog of my own, Trina Marie's Recipes. Feel free to check it out. I was revamping this blog for my mom when I noticed this gem from 10/17/13, 9:56 AM. I'm not sure why it wasn't published back then but enjoy~

Apple Brownies with Boiled Apple Cider Glaze


Hi everybody :)
Happy Fall to you!! Happy Fall to me!! I know I'm off to a late start welcoming the Fall, but I am excited that it's finally here. To get into the "Fall of things" I made boiled apple cider and a repeat of a Fall Favorite; Apple Brownies!


Apple Brownies with Boiled Apple Cider Glaze
1 Recipe for  Apple Brownies (Since hubby don't like nuts, I omitted the nuts in the batter but sprinkled a few on top when served) 
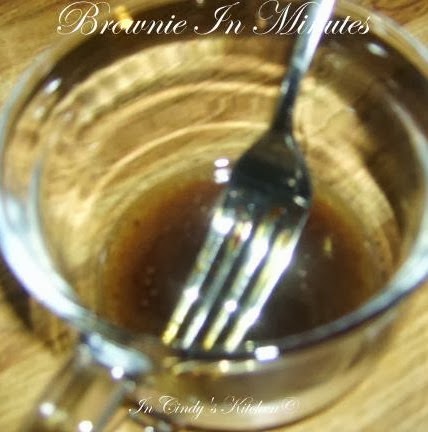
2 tablespoons Boiled Apple Cider  or buy here
1/3 cup Powdered Sugar, sifted
1 teaspoon Butter or Margarine, melted

In a bowl whisk together the boiled cider, sugar, and butter until smooth. Spread over cooled brownies, cut, and serve. 


Sprinkle with chopped pecans or walnuts if desired.


ENJOY! Come again...

Thursday, October 17, 2013

Raspberry Sauce

Raspberry Sauce

Hi everybody :)
I love a simply easy recipe. That's what this raspberry sauce recipe is all about, it's simple, easy and quick. Let's get it started... 

Raspberry Sauce partly adapted Allrecipes
1 bag frozen raspberries
1/4 cup white sugar, or more if needed
 2 tablespoons cornstarch
1 cup cold water 
2 teaspoons lemon juice 
1 teaspoon raspberry extract, optional 
Combine the raspberries, sugar, and juice in a saucepan. Whisk the cornstarch into the cold water until smooth. Add the mixture to the saucepan and bring to a boil.
Simmer for about 5 minutes, stirring constantly, until the desired consistency is reached. The sauce will thicken further as it cools.
Strain sauce through a fine sieve. (You may have to use a spatula or the back of a spoon to help push the sauce through.)
Serve warm or cold. Pour into plastic container and label it. It will keep in the refrigerator for up to two weeks.
Serve over cakes or ice cream, if desired.
The Taste: This sauce was delicious, I served it with pound cake and whipped cream. Definitely a winner in my book and a tasty REPEAT! 
ENJOY! Come again... 
Linked to:
Full Plate Thursday @ Miz Helen's Country Cottage   
The Mandatory Mooch Tasty Thursday 
Show Case Your Talent  @What's Cooking Love 
Thursday's Treasures Week 108
The Better Baker Weekend Potluck
From the Farm Blog Hop 

Tuesday, October 8, 2013

Granola Bars with Raspberry Jammy Bits

Granola Bars with Raspberry Jammy Bits

Hi everybody :)
My daughter, Patrina, raided my freezer and discovered 2 bags of Raspberry Jammy Bits I had stored away. She looked online, found a recipe, and made these bars a few days ago. She been so busy that she asked me to share them with you all. Well, let's get it started...
Granola Bars with Raspberry Jammy Bits adapted from King Arthur Flour
1 2/3 cups quick-cooking rolled oats (I used Old-Fashioned)
3/4 cup Sticky Bun Sugar (1/2 cup brown sugar)
1/3 cup oat flour, or finely ground rolled oats (I used King Arthur Whole Wheat flour)
1/2 teaspoon salt

1/4 teaspoon ground cinnamon, optional
1 1/2 cups nuts*
1 cup Raspberry Jammy Bits (I used 3/4 cup)
1 teaspoon vanilla extract
1/4 cup melted butter or vegetable oil ( I used coconut oil)
1/4 cup honey, maple syrup, or corn syrup( I used corn syrup but, think agave would work fine too)
1 tablespoon water
*3/4 cup sliced almonds and 3/4 cup unsweetened coconut.
 

Preheat the oven to 325°F. Lightly grease (I used parchment paper instead of greasing the pan to make cutting the bars and lifting them out easier) a 9" x 13" pan. (Bars were thin, for thicker bars use a 7"x12" pan.)
 

Stir together the dry ingredients, including the nuts and Jammy Bits.
 

In a separate bowl, whisk together the vanilla, melted butter or oil, honey or syrup, and water.
 

Toss the wet ingredients with the dry until the mixture is evenly crumbly.
 

Spread in the prepared pan, shaking the pan to evenly cover the bottom, and pressing in firmly (I used plastic wrap to help press the bars down).
 

Bake the bars for 25 to 30 minutes (It only took me 22 min.), until they're just starting to brown, and are bubbly around the edges.
 

Remove them from the oven and cool for 10 minutes.

Use a knife to cut the bars while they're still warm. Let cool completely before removing from the pan.  (I removed the parchment paper from the pan in order to cut the bars, and placed the paper and bars back in the pan to finish cooling.)
 
Yield: about 1 dozen 2" x 4 1/2" bars

What She Did and/or Thinks:
The changes she made are in Italic and Purple.  
The  Taste: Although she used less brown sugar and less jammy bits, I think the sweet taste should be cut down a little more. But all in all these were delicious, and we would definitely REPEAT this using agave or honey in the place of the corn syrup and 1/3 cup brown sugar. 
ENJOY! Come again...
Linked to:
Titus 2 Tuesday  
Kathe With an E You're Gonna Love It     
Wake Up Wednesdays 
Wednesday Whatsits #79
Wonderful Food Wednesday
All My Bloggy Friends #67
What's Cookin' Wednesday? 
Thursday's Treasures Week 107 
From the Farm Blog Hop
The Better Baker Weekend Potluck  

Thursday, October 3, 2013

Brownies In Minutes, Turtle Styled with Marshmallow Creme

Brownies In Minutes, Turtle Styled with Marshmallow Creme


Hi everybody :)
I know it's been a while since my last post. I've been kind of busy around the house lately. But I do have a nice treat to share with you all today. My daughter and I were having some fun tweaking this recipe. This brownie was prepared in a microwave in less than 2 minutes. If you follow my blog, you'll know that I normally shy away from "microwave cooking," but today I'm taking the plunge. Seeing that the recipe didn't required eggs makes it so much easier for me to accept the challenge. (Cooking eggs, meats, or fish in the microwave is still taking me some time getting accustomed to.)   

Want a deliciously moist fudge brownie in less than 2 minutes? Well, let's get it started...   

Brownie In Minutes 


Modified from: Brownie In A Cup 

3 Tablespoons hot water
1/4 teaspoon instant coffee  (optional)
2 Tablespoons oil
1/4 teaspoon vanilla
2 Tablespoons cocoa powder (I used 1 Tbsp. Special Dark & 1 Tbsp. Regular)
2 Tablespoons packed brown sugar
1 Tablespoon sugar
1 Tablespoon Jif Mocha Cappuccino Spread or chocolate chips (optional)
1 - 2 Tablespoon chopped pecans, toasted  (optional)
4 Tablespoons All Purpose Flour (I used 2 Tbsp. all-purpose & 2 Tbsp. White Lily Self-Rising, to give it a little lift.) 

Topping  (optional)
Marshmallow Creme
Smucker's Caramel Ice Cream Topping or Homemade Caramel
Smucker's Fudge Ice Cream Topping  (I used Jif Mocha Cappuccino Spread) 
Toasted Pecans, chopped
 
Whisk together water, coffee, oil, and vanilla in a medium bowl. (You can use the microwaveable mug or dish you're cooking it in.  If you want to turn it out onto a dish after cooking, mix in a bowl and spray the mug or dish nonstick cooking spray before pouring in the mixture.)


Add the cocoa powder, sugars, mocha spread, and flour; stir until smooth. 


Place in a microwaveable mug or dish. Cook in microwave for 1 1/2 to 2 minutes. (It took me 1 minute and 15 seconds) Check after the 1 minute mark. Center should still be soft. (The picture below is how it looked when finished cooking.)


 Top with marshmallow creme, drizzle with caramel and fudge and sprinkle with nuts.

The Taste: AMAZING! REPEAT, if you dare!! :)
ENJOY! Come again...
Linked to: 
Full Plate Thursday @ Miz Helen's Country Cottage  

Thursday, August 22, 2013

Mini Peach Cobblers: Sweet Georgia Pride

Mini Peach Cobblers: Sweet Georgia Pride

Hi everybody :)

As you may know August is Peach Month, and since we Georgians pride ourselves on our peaches and are well- known for our peach cobblers, this recipe is so fitting for the occasion. 

I so love baking in large batches, but I have such a small family with a member or two MIA (missing in action) more often than not.  I'm starting to rethink my baking habits. I spotted this recipe for Southern Peach Cobbler on Allrecipes, and made a few changes and adjustments here and there to make mini cobblers. Here's what I did...

Mini Peach Cobblers
Filling:
6 fresh peaches - peeled, pitted and sliced into wedges (Ga. grown; of course)
2 1/2 tablespoons white sugar
2 1/2 tablespoons brown sugar
1/4 teaspoon ground cinnamon

Pinch ground nutmeg
1/2 teaspoon fresh lemon juice

2 teaspoons cornstarch
1 1/2 tablespoons Peach Schnapps (optional)
Crust:
1 cup all-purpose flour

2 1/2 tablespoons white sugar
1/4 cup brown sugar
1 teaspoon baking powder
1/2 teaspoon salt
6 tablespoons unsalted butter, chilled and cut into small pieces
1/4 cup boiling water

Topping:
3 tablespoons white sugar
1 teaspoon ground cinnamon

Preheat oven to 425 degrees F (220 degrees C).
   
In a large bowl, combine the filling ingredients.  Toss to coat evenly, mashing slightly.  Cover, refrigerate, and let sit for about 2 - 3 hours. (This will allow the peaches to release more juice and the flavors to blend.)

Pour into three 8 ounces ceramic ramekin baking dishes. Bake in preheated oven for 10 minutes. (filling will start to thicken)
Meanwhile, in a large bowl, combine the first 5 ingredients for the crust. Blend in butter with your fingertips, or a pastry blender, until mixture resembles coarse meal. Stir in water until just combined. (The hot water will start to melt the butter somewhat.)
Remove peaches from oven and drop spoonfuls of topping over them. Sprinkle cobblers with the sugar and cinnamon mixture. 
Bake until topping is golden, about 15 - 20 minutes. (It took me 18 minutes.)
What I Think:
The cobblers were delicious; spiced just right!! The smell of them baking was amazing. These are surely going on the REPEAT list :)   
BTW: a small bit of advice, if your are going to make the recipe as stated on Allrecipes, I would double the crust by 1/2 ( using 1 1/2 cup flour, 9 tablespoons butter, leaving the baking powder, salt as is and sweeten with sugars to taste  and 1/4 plus 2 Tbsp. water .)
ENJOY! Come again... 
Linked to: 


From the Farm Blog Hop
Show Case Your Talent  @What's Cooking Love
Show and Share Wednesday Semi-Homemade Mom 
Full Plate Thursday @ Miz Helen's Country Cottage
Food-Tastic Fridays @ Not Your Ordinary Recipes

Foodie Fridays @ Designs By Gollum 
Friday Food Frenzy 823 
The Country Cook:: Weekend Potluck 
Melt In Your Mouth Monday @ Make Ahead Meals for Busy Moms 
Flour Me With Love: Mix it up Monday!
Mop Up Mondays - I Should be Mopping the Floor  
Marvelous Mondays @ This Gal Cooks
Skip To My Lou: Made by you Monday
Wake Up Wednesdays 
 Two Girls and a Party Link Up 32
               

Monday, June 3, 2013

Chunky Chocolate Cookies

Chunky Chocolate Cookies  

Hi everybody :)
Graduation Day came and went and I'm back HOME! It's great being back. I've been so busy lately organizing after coming back home; trying to jam an apartment into an already packed house is hard work.

My daughter's ankle is still on the mend, but she's walking a little now, so her walking boot is useful after all. :) She will be taking the Bar Exam soon. I'm going to be the proud mother of a lawyer, y'all!! 
 
Enough talk about me and my family; now, on to the recipe, Chunky Chocolate Cookies. These cookies are made with a cake mix, so they are so easy to make for busy moms on the go. The nuts can be omitted and the chips exchanged to suit your taste. Let's get it started...


Chunky Chocolate Cookies
1 pkg. Duncan Hines Classic Dark Chocolate Fudge Cake Mix
2 large eggs
1/2 cup butter or margarine (1 stick); melted
1/4 cup firmly packed brown sugar
1 teaspoon vanilla extract
1 cup semisweet chocolate chips
1/2 cup chopped pecans or walnuts

Preheat oven to 350.

Mix cake mix, eggs, butter, brown sugar, and vanilla extract in a large bowl; stirring with a spoon until well blended.

Stir in chips and nuts. Drop by leveled measuring tablespoonfuls onto greased baking sheets. (I used my medium cookie scoop and baked the cookies on parchment paper.)

Bake at 350 for 12 minutes for chewy cookies or 14 minutes for crispy cookies.  (I baked my cookies 8 minutes for chewy and 10 minutes for crispy.)

Cool 2 minutes on baking sheets and move to wire rack to finish cooling. Store in airtight container. 
Source: Duncan Hines 
What I Did and/or Think: 
The changes I made are in Bold, Italic, and Purple.

The Taste: These cookies were GREAT! Love the taste.  Definitely worthy of REPEATING!

ENJOY! Come again...       
Linked to:
Titus 2 Tuesday 
Zentmrs: Tuesday Table 
Wednesdays Adorned From Above 
Show and Share Wednesday Semi-Homemade Mom
The Better Baker Weekend Potluck

Wednesday, May 8, 2013

Easy Peanut Butter Cookies: Only 3 Ingredients

Easy Peanut Butter Cookies: Only 3 Ingredients

Hi everybody :)
Sorry about not posting sooner, I been really busy packing up my daughter stuff in her apartment.  She is taking her finals this week,  the semester is almost over!  Next stop....  GRADUATION! Yipee!!! Then, I'll be back home :) These cookies below are ones she loves to bake because they are soooo easy, but since she still can't walk yet; she ask me to bake them for her. They are peanut butter cookies with just three ingredients and contains no flour!  Super easy right? I know. So, let get it started.

Easy Peanut Butter Cookies
1 cup peanut butter (I used Jif Creamy)
1 cup sugar (I used 1 part granulated and 1 part brown sugar)
1 egg, slightly beaten
1/2 teaspoon vanilla extract, optional 

Preheat oven to 350 degree. Line cookie sheet with parchment paper. 
Combine all the ingredients in a medium mixing bowl until well blended.  
Drop cookie dough by tablespoonful onto prepared sheet. Use tines of a fork dipped in sugar to make a crisscross pattern on top of each cookies if desired.

Bake until golden brown, about 12 - 15 minutes. Yield: 2 dozen.
SourceTaste of Home
What I Did and/or Think:
Well, I did make a few changes to the three ingredients formula by adding brown sugar for a more chewier texture  and and vanilla. The changes I made are in Bold, Italic, and Purple
For Easy Peanut Butter Blossom version: Shape the dough into 3/4" ball before baking. Bake for about 8 - 10 minutes on ungreased cookie sheet. Press chocolate kiss into the center of each cookies, like in the instructions found here. Yield about 3 dozen.
The Taste: These cookies were GREAT! Love the flavor and the chewiness, definitely worthy of REPEATING! 
ENJOY! Come again...
*********Update*********  
Easy Chunky Peanut Butter Cookies
I been making these cookies for the past few weeks about every 3 to 4 days. My family really love them. I changed the recipe up a little more by adding 1/4 cup granulated sugar and 3/4 cup brown sugar, using extra chunky peanut butter and adding 3/4 cup mini Reese's Pieces peanut butter chips. Scoop out onto parchment lined cookie cookies sheet flatten slightly; cookie don't spread much. Baking them at 350 for 8 - 10 minutes 
Link to:
Wednesday's Adorned From Above Blog Hop 51
Bizzy Bake Recipe Box 
Show and Share Wednesday Semi-Homemade Mom
Hookin' Up @ House of Hepworths   
The Mandatory Mooch Tasty Thursday
Show Case Your Talent  @What's Cooking Love
Full Plate Thursday @ Miz Helen's Country Cottage

Foodie Fridays @ Designs By Gollum
The Better Baker Weekend Potluck
Strut Your Stuff Saturday @ Six Sister's Stuff

Friday, April 5, 2013

Chocolate Chips Cookies: Chewy or Crispy

Chocolate Chips Cookies: Chewy or Crispy

Hi everybody :)
I promised a recipe was coming soon so here it is, Chocolate Chip Cookies. I know, I know there are thousand of chocolate chip cookie recipe out there, but this one caught my attention because with few changes; you can make your cookies chewy or crispy. You decide. Anna Olson, Pastry Chef at Canada Food Network, noted for crispy cookies omit the cornstarch and replace the baking soda with baking powder. Now, let's get it started... 
Chocolate Chip Cookies
3/4 cup unsalted butter, softened
1 cup brown sugar
1/4 cup granulated sugar
1 egg
2 teaspoons vanilla extract
2 cups all purpose flour
2 teaspoons cornstarch
1 teaspoon baking soda
1/2 teaspoon salt
8 ounces bittersweet chocolate, cut into chunks (I used 1 cup milk chocolate chips)

In an electric mixer cream together butter and sugars until smooth and light in color, about 2 minutes with stand mixer

Add egg and vanilla and blend in.
In a bowl; mix together flour, cornstarch, baking soda and salt. Stir in chocolate chunks. 
(Dough can be refrigerated at this point and baked about an hour later, or shaped and frozen following the direction here  for an easy make-ahead recipe. If baking from a frozen dough add about two more minutes to baking time.)
 
Drop by tablespoons onto a greased baking sheet in an oven preheated at 350 degree. (I used parchment paper.) Bake for 8-10 minutes, until golden brown around the edge.
Source: Food Network
 
What I Did and/or Think: 
The changes I made are in Bold, Italic, and Purple.   Brown sugar also helps when making a chewier cookies especially dark brown sugar. Sometime when making cookies that call for brown sugar I like to use 1 part dark brown and 1 part light brown to get the amount of chewiness I love.

The Taste: I love the chewy chocolatey taste of these cookies and so does my daughter. She requested more after class. 

How do you like your chocolate chip cookies? Either way you choose, I think you will find this recipe a winner, so they're definitely worthy of REPEATS.
ENJOY!  Come again... 
Linked to: 
Foodie Friends Friday @Nosh My Way
The Better Baker Weekend Potluck 
The Mandatory Mooch Tasty Thursday
Full Plate Thursday @ Miz Helen's Country Cottage 
Strut Your Stuff Saturday @ Six Sister's Stuff 
Sweet Saturday Link Party: The Gingerbread Blog 
Wednesdays Adorned From Above

Mop Up Mondays - I Should be Mopping the Floor  
Flour Me With Love: Mix it up Monday!
Sweet 2 Eat Baking: Sugar & Slice Sunday Melt In Your Mouth Monday @ Make Ahead Meals for Busy Moms 
The Chicken Chick: Clever Chicks Blog Hop 
Tried and True Recipes Party  
Zentmrs: Tuesday Table
Titus 2 Tuesday 
Tuesday-Talent-Show:  Chef In Training    

Followers