Search This Blog

Saturday, September 22, 2012

Cheddar Cheese Loaves

Cheddar Cheese Loaves 


Hi everybody :)

Today is the beginning of Fall, HOORAY!

Don't worry this is not another apple post either, but it is something I love to do in the Fall.... I love baking bread in the Fall. Although, I do have a great apple bread recipe.... I will share it at a later time :)

Today recipe is a Cheddar Cheese Loaf. I know I have loaves in the title at the top, and I did make the full recipe, but I didn't bake the second loaf yet. I wanted to have a little fun and experiment with it first, I  will share the results at a later time. I did bake the first loaf according to the recipe, now lets get it started.

Cheddar Loaves adapted Taste of Home Baking, All NEW Edition


Ingredients
3 teaspoons active dry yeast
1/2 cup warm water (110 to 115°)
2 cups warm 2% milk (110° to 115°)
2 tablespoons butter, melted
2 eggs
3 teaspoons sugar
2 teaspoons salt
6 to 6-1/2 cups all-purpose flour
2 cups (8 ounces) shredded sharp Cheddar cheese (I used mild Cheddar Cheese)

Directions:

In a large bowl, dissolve yeast in warm water. Add the milk, butter, sugar, salt and 6 cups flour. Beat on medium speed for 3 minutes. Stir in enough remaining flour to form a soft dough.Turn onto a lightly floured surface; knead until smooth and elastic, about 6 - 8 minutes.
Dough after Kneading


Place in a greased bowl. turning once to grease top. Cover and lot rise in a warm place until doubled, about 1 hour.
I added Cheese before Proofing


Punch dough down. Turn onto a lightly floured surface, knead cheese  into the dough.
Dough divided into Loaves


Dough before Proofing


Divide in half; shape each portion into a 6-in. round loaf. Place on greased baking sheets. Cover and let rise until doubled, about 45 minutes
Finished Loaf


Bake at 350 for 35-40 minutes or until golden brown. Remove from pans to wire racks to cool. Refrigerate leftovers.


What I Did and/or Think:
As you can see from the photos I adding the cheese before letting the dough rises, divided the loaves but only did one loaf. I also used mild cheddar cheese instead of sharp.

The taste of the bread was good, it had a nice soft chewy texture with a light cheesy taste to it. It would be great for toast or served along side a salad. All in all... this is another GREAT REPEAT!

As I mention earlier, I saved the second loaf to experiment with a little, and I will share the results later. In the meanwhile, if your looking for a good loaf or two, maybe you should try this one...I know you'll like it


ENJOY! Come again....

****** UPDATE: I made Pepperoni Rolls with the other bread dough! 


Linked to  
Yeastspotting!,   
Strut Your Stuff Saturday Link Party -  Week 63 
Skip To My Lou: Made by you Monday
BYOB @ girlichef: BYOB - Bake Your Own Bread
The Chicken Chick:: Clever Chicks Blog Hop 5 
Jaime @ Mom's Test Kitchen

Wednesday, September 19, 2012

Frosted Grapes

Frosted Grapes


Hi everybody :)

Today recipe is a super easy one I found while browsing the web. Don't worry it's not about apples... but it is about fruits....GRAPES!

Frosted Grapes...they are perfect for parties, entertaining, or just for snacking, and the recipe comes together in a SNAP! The best part about it is; it just take two ingredients to make: jello and seedless grapes.

Frosted Grapes adapted All Recipes.com


Ingredients:
2 pounds red seedless grapes (or your choice of seedless grapes)
1 (3 ounce) package cherry flavored gelatin mix (or your choice of gelatin)

What I Did:
I used 3 kinds of seedless grapes. The jello flavors I used were lime, raspberry, black cherry and strawberry.

I washed, separated and plucked the grapes from their stems and rinse in a colander. 


For each grape type I put them back into the colander to damp them 


and add some of the jello and toss. 


Place them in freezer zip-lock bags add the remaining jello and repeat with the other grapes and jello. Freeze about 2 hours or until set. (To get a good coating more jello is sometimes needed.)


For the Green Grapes I used Lime and Strawberry Jello


For the Red Grapes, I used Raspberry Jello.


For the Black Grapes, I used Black Cherry Jello. 


What I Think:  
 I really like this idea. I think sugar-free jello will work well with this recipe too. I'm sure kids will also love this one. The grapes were DELICIOUS and definitely worthy of a REPEAT.


ENJOY! Come again..... 

 Linked to  
Rattlebridge Farms: Foodie Friday 
Full Plate Thursday @ Miz Helen's Country Cottage
 Whatever Goes Wednesday @ Someday Crafts 
Whatcha' Whipped Up Wednesday @ DJ's Sugar Shack
Tastetastic Thursday @ A Little Nosh 

Tuesday, September 18, 2012

Cinnamon Apple Crisp: Three Days 'til Fall

Cinnamon Apple Crisp: Three Days 'til Fall


Hi everybody :)

Did you know in three more days Fall will be HERE!

Hooray, Hooray FALL IS NEAR!

I guess if you didn't know it before, you know now, that fall is my favorite time of year. I even wrote a poem about it here

I know you all didn't come here to hear me go on and on about how I love Fall; so let's get on to the recipe; which by the way is perfect for Fall :)

Okay, okay.... today's recipe is all about apples, I know I've been posting a lot of apple recipes lately, but I've have a feeling you're going to looovvvvve  this one.

Apple Crisp is my favorite Fall dessert, maybe after you taste this one, it will become yours too. Let's get it started....


Apple Crisp adapted partly Taste of Home: Baking

Ingredients:

Filling:


8 cups sliced peeled tart apples (I used Ganny Smith and Golden Delicious)
1 tablespoon lemon juice
1/2 cup sugar
1/2 teaspoon ground cinnamon (I used cinnamon extract, 1/4 teaspoon) here
1/8 teaspoon salt
1/4 cup apple cider
2 tablespoons cornstarch (not shown in picture)
1/4 teaspoon apple pie spice
1/4 cup caramel bits
2 tablespoon butter, cut into pieces (not shown in picture)

Topping:


1/2 cup quick-cooking oats (I used 3/4 cup  old fashioned)
1/2 cup all-purpose flour (I used 3/4 cup)
1/2 cup packed brown sugar (I used 3/4 cup)
1/2 teaspoon ground cinnamon
1/4 teaspoon baking powder
Pinch salt
1/8 teaspoon baking soda
3 tablespoons cold butter (I used 5 tablespoons)
Vanilla ice cream, optional
Caramel Ice Cream Topping, optional
1/4 cup Toasted Sugared Walnuts, or Walnut Ice Cream instead of Vanilla optional

In a large bowl, toss apple in lemon juice and add the remaining filling ingredients.
Filling Mixture


Pour into a greased 8-in. square baking dish.

In a bowl, combine the oats, flour, brown sugar, cinnamon, baking powder, salt, and baking soda.
Topping Mixture without Butter


Cut in butter until mixture resembles coarse crumbs.
Topping Mixture with Butter


Sprinkle over apple mixture.
Crisp before Baking


Bake at 350 for 55-60 minutes or until apples are tender and topping is golden. Place sheet pan on second rack to catch drippings.


Let cool to warm about 1 1/2 -2 hours; served with ice cream and caramel topping if desired.


What I Did and /or Think:

The changes I made are in Italic, as stated above.

For the Sugared Walnuts:
I toasted the walnuts with 1/2 tablespoon cinnamon/sugar, 1 teaspoon butter and pinch salt until fragrant; about 8 - 10 minutes in 350 oven; cool and sprinkle on top of ice cream along with caramel topping.


Sugared Walnuts


The Taste: DDDELICIOUS! REPEAT ALL AROUND!!


ENJOY! Come again.....

Linked to:
Rattlebridge Farms: Foodie Friday 
Tasty Tuesday (Food Only) @ Naptime Creation
Tuesday-Talent-Show:  Chef In Training 
 33 Shades of Green-Tasty Tuesday
 Show Me What You Got Tuesday's at ODH 
 Fall Favorites Link Party

Monday, September 17, 2012

Taco Chicken Fingers or Salad: Two Ways to Serve

Taco Chicken Fingers or Salad: Two Ways to Serve

Taco Chicken Fingers: The Appetizer

  OR....

Taco Chicken Salad: The Main Course


Hi everybody :)

I'm finally coming down from my sugar-high from this post. Today I wanted to keep it light and simple. So I decided to do a recipe that you can serve up twice, in two different ways. One as a appetizer served with salsa, sour cream, guacamole, and chips; that would be perfect for entertaining. The other as a main course salad with a salsa dressing.

These two recipes begin with chicken breast. The chicken breasts are cut into tenders, coated with a tortilla crust, baked in the oven and used as an appetizer or in a salad. 

This recipe comes from my cookbook collection and here's is how it's done;


Taco Chicken Fingers From CREATIVE COOK'S KITCHEN COOKBOOK


For Chicken Fingers
4  boneless, skinless chicken breasts halves (about 1 1/4 - l 1/2 pounds) (I used three chicken breasts)
1/2 cup mayonnaise
3 tablespoons milk (not shown in picture)
1 bag (9 ounces) tortilla chips
1 tablespoon taco seasoning


For to Serve:
salsa
sour cream
guacamole
tortilla chips

Cooking The Chicken:


Preheat oven to 425°F. Lightly grease a baking sheet. Cut each chicken breast half crosswise into 1/2-inch strips.
Chicken Tenders


In a large shallow bowl, whisk mayonnaise and milk until blended and smooth.
Milk & Mayonnaise


Place tortilla chips in a resealable plastic bag. Using a rolling pin, crush chips into fine crumbs.
Crushed Chips


In another large shallow bowl, toss 1 1/4 cups crushed tortilla chips with taco seasoning; mix well. Toss chicken strips first in mayonnaise mixture, then in crushed tortilla chips. 
Chicken with Coating - Uncooked


Tips: To maintain the tortilla crumb coating, refrigerate the coated chicken strips for 30 minutes before cooking.
Uncooked Chicken on Sheet


Place on prepared baking sheet (do not overlap).
Bake until just browned and chicken is cooked through, 10-12 minutes. Serve with salsa, sour cream and guacamole.


Or...
Taco Chicken Salad From CREATIVE COOK'S KITCHEN COOKBOOK


For Individual Salads:
Taco Chicken Fingers (recipe above)
Salsa (I used 2 parts salsa)
Mayonnaise (I used 1 part mayonnaise)
Lettuce or Salad Mix (I used salad mix)
Tomatoes
Avocado
Cucumber
Mexican Blend or Cheddar Cheese (not shown in picture)
Tortilla Chips, broken into pieces (not shown in picture)

To Make the Dressing:
Mix salsa and mayonnaise in a small bowl until combine, set aside.
2 parts Salsa & 1 part Mayonnaise


The Dressing


Fill lettuce cups with taco Chicken Fingers, then top with diced tomatoes, avocado, cucumber, cheese, chips or whatever you like.


What I Did and/or Think:
I followed the recipe and tip for the fingers.

The taste was Excellent. The chips adhere very well and stay on fairly well after cooking so I was please. I LOVE Mexican-Styled dishes so this is definitely a REPEAT! or Esto es definitivamente un REPEAT ! ( in Spanish)  :)

For the salad, I combine the things I thought would make a great salad. Using the idea for the dressing, I   mixed it 2 parts salsa, 1 part mayonnaise and because I wanted a little kick to it, I use Pace Medium Salsa.

This was worthy of a REPEAT also.

ENJOY! Come again.....

Linked to:
Make Ahead Meals for Busy Moms: Melt-in-Your-Mouth Monday Recipe Blog Hop # 83
Jaime @ Mom's Test Kitchen
Flour Me With Love: Mix it up Monday!
Just Something I Whipped Up at Project Inspire (The Girl Creative)
Katherine Martinelli: Taco Blog Hop

Sunday, September 16, 2012

Apple Pancakes with Apple Cider Syrup: Breakfast Is Served

Apple Pancakes with Apple Cider Syrup: Breakfast Is Served


Hi everybody :)

Welcome to another Breakfast Is Served Sunday, if you're just tuning in to my blog every Sunday I post a Breakfast Is Served, today you're in for a treat. I have not one but two recipes to share. YAH!  :) The last Breakfast Is Served is found here.

I decided to make apple pancakes and apple cider syrup for breakfast today because I thought it would be perfect for Fall. Here's how I made it:

For The Pancakes:


Apple Pancakes adapted partly Cook's Illustrated Cookbook
1 1/2 cups milk (use less milk for thicker pancakes more for thinner)
1 tablespoon lemon juice
1 1/2 - 2 cups (10 ounces) all-purpose flour (use less flour for thicker pancakes more for thinner)
1 1/2 tablespoons sugar
2 teaspoons baking powder
1/2 teaspoon baking soda
1/2 teaspoon salt (not shown in picture)
1 large egg
2 tablespoons unsalted butter, melted and cooled (not shown in picture)
3/4 cup diced peeled apple (1 apple) (I used Golden Delicious)
1-2 teaspoons vegetable oil

Whisk milk and lemon juice together in large measuring cup; set aside to thicken while preparing other ingredients. Whisk flour, sugar, baking powder, baking soda, and salt together in medium bowl.

Dry Mixture


Add egg, melted butter, and apple to milk mixture and whisk until combined. Make well in center of dry ingredients; pour in milk mixture and whisk very gently until just combined (few lumps should remain). Do not over-mix.

Adding Milk Mixture to Dry Mixture


.


Heat 1 tablespoon oil in 12-inch non-stick skillet over medium heat until shimmering. When the pan is hot, turn it down slightly. For each pancake, pour 1/4 cup of the batter onto the center of the skillet.  Cook pancakes until large bubbles begin to appear, 1 1/2 to 2 minutes.

Pancake Before Flipping


Using thin, wide spatula. Flip pancakes and cook until second side is golden brown, 1 to 1 1/2 minutes longer. Repeat with remaining batter, adding more oil to the pan as necessary. Makes about 8 medium pancakes, Serving 4 to 6


For the Apple Cider Syrup: 


Apple Cider Syrup: adapted Taste of Home
1/2 cup sugar
tablespoon cornstarch 
1/8  teaspoon ground cinnamon
1/8  teaspoon ground nutmeg ( I used apple pie spice)
1 cup apple cider or juice
tablespoons butter, cubed
tablespoon lemon juice
I added thinly slice apples and chopped toasted walnuts.

For the  Syrup:
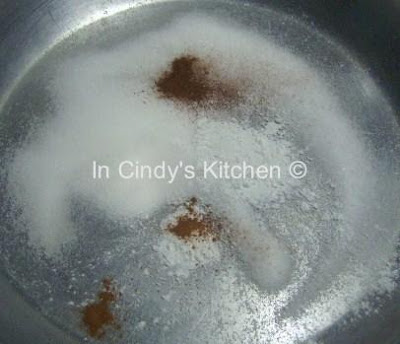
In a small saucepan, combine the sugar, cornstarch, cinnamon and nutmeg. 
Sugar Mixture


Stir in cider until smooth. 
Sugar Mixture and Apple Cider


Cook and stir over medium-high heat until thickened and bubbly, about 5 minutes. Reduce heat to low; cook and stir 2 minutes longer.
Adding Juice and Butter


 Stir in butter, lemon juice, and
Adding thinly sliced Apple


1 thinly sliced apple. Add toasted walnuts to the syrup and serve with pancakes. (1-1/2 cups syrup).


What I Did and/or Think:
I made the following changes I listed above; using apple pie spice and adding apple and walnut to the syrup.

The pancakes were light, fluffy and delicious. The syrup was lemony and delicious; was GREAT with the pancakes. This is definitely a REPEAT!


 ENJOY! Come again..... 

Linked to:   
Make Ahead Meals for Busy Moms: Melt-in-Your-Mouth Monday Recipe Blog Hop # 83
Just Something I Whipped Up
Flour Me With Love: Mix it up Monday!
Sundae Scoop @ I Heart Naptime
Jaime @ Mom's Test Kitchen
Scrumptious Sunday Recipe Link Party @ AddictedRecipes
Must Try Mondays: My Favorite Finds 
Fall Favorites Link Party

Followers