Search This Blog

Showing posts with label Cake Mix. Show all posts

Monday, June 3, 2013

Chunky Chocolate Cookies

Chunky Chocolate Cookies  

Hi everybody :)
Graduation Day came and went and I'm back HOME! It's great being back. I've been so busy lately organizing after coming back home; trying to jam an apartment into an already packed house is hard work.

My daughter's ankle is still on the mend, but she's walking a little now, so her walking boot is useful after all. :) She will be taking the Bar Exam soon. I'm going to be the proud mother of a lawyer, y'all!! 
 
Enough talk about me and my family; now, on to the recipe, Chunky Chocolate Cookies. These cookies are made with a cake mix, so they are so easy to make for busy moms on the go. The nuts can be omitted and the chips exchanged to suit your taste. Let's get it started...


Chunky Chocolate Cookies
1 pkg. Duncan Hines Classic Dark Chocolate Fudge Cake Mix
2 large eggs
1/2 cup butter or margarine (1 stick); melted
1/4 cup firmly packed brown sugar
1 teaspoon vanilla extract
1 cup semisweet chocolate chips
1/2 cup chopped pecans or walnuts

Preheat oven to 350.

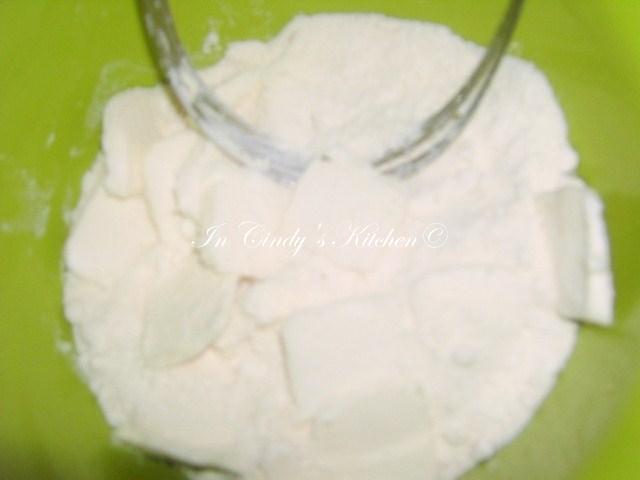
Mix cake mix, eggs, butter, brown sugar, and vanilla extract in a large bowl; stirring with a spoon until well blended.

Stir in chips and nuts. Drop by leveled measuring tablespoonfuls onto greased baking sheets. (I used my medium cookie scoop and baked the cookies on parchment paper.)

Bake at 350 for 12 minutes for chewy cookies or 14 minutes for crispy cookies.  (I baked my cookies 8 minutes for chewy and 10 minutes for crispy.)

Cool 2 minutes on baking sheets and move to wire rack to finish cooling. Store in airtight container. 
Source: Duncan Hines 
What I Did and/or Think: 
The changes I made are in Bold, Italic, and Purple.

The Taste: These cookies were GREAT! Love the taste.  Definitely worthy of REPEATING!

ENJOY! Come again...       
Linked to:
Titus 2 Tuesday 
Zentmrs: Tuesday Table 
Wednesdays Adorned From Above 
Show and Share Wednesday Semi-Homemade Mom
The Better Baker Weekend Potluck

Thursday, January 3, 2013

Cherry-Pineapple Dump Cake: With an Extra Step

Cherry-Pineapple Dump Cake 

 Hi everybody :)

Today I'm sharing one of my family favorites; Cherry-Pineapple Dump Cake. The name, "Dump Cake", comes from the fact that all the ingredients used in the cake are basically dumped in a pan on top of each other. This particular dump cake have been seen around often on other blog site. It's simple, easily prepared, and taste delicious. 

Because it's a family favorite, I been making it for years. In the beginning I discovered a problem: When cutting the butter into thin slices over the cake mix, not all the cake mix is covered with the butter, so you would end up with dry cake spots. To fix this; I first tried melting the butter as I seen in some of the dump cakes recipes, but I was not please with that result either. Then I came up with this idea while making biscuit one day, and it produced a buttery flaky dump cake every time.  I put an extra step in the recipe. To ensure the cake mix don't have dry flour spots after baking, I use a pastry blender. Here's what I did...  


 Cherry-Pineapple Dump Cake adapted Favorite Brand Name: Easy-to-Bake Cookbook or here

Ingredients:
1(20 oz.) can crushed pineapple with juice; undrained
1 can (21 ounces) cherry pie filling
1 package DUNCAN HINES® Moist Deluxe® Classic Yellow Cake Mix
1 cup chopped pecans or walnuts
1/2 cup (1 stick) butter or margarine, cut into thin slices

Directions:
Preheat oven to 350°F. Grease 13×9-inch pan.
Dump pineapple with juice into prepared pan. Spread evenly. 
Dump in pie filling. Spread evenly. 
 Sprinkle cake mix evenly over cherry layer. (I blend the cake mix and butter with a pastry blender until it resemble small peas, than sprinkled it over cherry layer. This extra step ensure that the cake mix is well coated with butter, so there is no dry cake spots.)
Sprinkle pecans over cake mix. (Because hubby don't like nuts, I only put nuts on part of the cake) Dot with butter. Bake at 350°F for 50 minutes or until top is lightly browned. Serve warm or at room temperature.
Tip: You can use DUNCAN HINES® Moist Deluxe® Pineapple Supreme Cake Mix in place of Moist Deluxe® Yellow Cake Mix.
ENJOY Come again... 

Linked to: 
The Mandatory Mooch Tasty Thursday  
Show Case Your Talent  @What's Cooking Love 
Full Plate Thursday @ Miz Helen's Country Cottage 
Cupcakes Garden: Just Desserts Thursday
Food-Tastic Fridays @ Not Your Ordinary Recipes 
Foodie Fridays @ Designs By Gollum 
Blissful and Domestic Friday Link Party 
Simply Link Party: Simply Designing   
Miss Information: I Freakin' Did It Friday
  @ 21st Century Housewife 
Home Maid Simple: Foodie Friday 
Buns In My Oven: Let's Get Linky 
Sweets for Saturday @ Sweet As Sugar Cookies
Mop Up Mondays - I Should be Mopping the Floor  
Sweet 2 Eat Baking: Sugar & Slice Sunday  

Friday, November 16, 2012

Chocolate Turtle Pudding Poke Cake: My 100th Post!

Chocolate Turtle Pudding Poke Cake: My 100th Post!


Hi everybody :)

Bring your favorite chocolate dessert to Roxana’s Home Baking #chocolateparty and win amazing prizes from OXO, Calphalon, Keurig, Imperial Sugar, Honey Ridge Farms and Land O’ Lakes® Butter

Today is my 100th post! YES! From the time when I posted Red Velvet Cake, my very first post to now. WOW! I didn't know NOTHING about blogging back then, I'm still learning now. I started out because I just wanted to share my joy of baking with the world. 

During the few months I been blogging, I notice my most popular post is the Red Velvet Poke Cake. So to celebrate, for days, I been thinking of a way to make an out-of-this-world-amazing chocolate poke cake. I think I accomplish my mission, Chocolate Turtle Pudding Poke Cake. Here's  what I did...
 Chocolate Turtle Pudding Poke Cake inspired My Recipes America's Favorite Food
 or online here.
 
The Cake:


1 (18.25-oz.) package devil's food cake mix
3 large eggs
1  cup milk, buttermilk , sour cream, or water
1/2 cup oil
2 teaspoons vanilla extract
1 teaspoon instant coffee granules 

1 tablespoon cocoa  + more for sprinkling pan

The Filling:


2 (3.9-oz.) package chocolate instant pudding mix (prepare as directed on the box)
1/2 cup Dulce de Leche (I used homemade following this recipe)
2 Tablespoon Kahlua, optional

The Topping:


1 (16-oz.) can ready-to-spread chocolate fudge frosting (save about 3 tablespoons for drizzling)
4 oz. (1/2  8 oz. container)  Cool Whip, thawed

5 (1.76-oz.) packages turtle candies (2 packages for garnishing) 3 turtles per pack or 15 turtles
Dulce de leche for garnish


DIRECTIONS 


For the Cake:
Preheat oven to 350°. Grease 13 by 9 inches pan sprinkle with cocoa. Set aside.

Beat cake mix and remaining ingredients at low speed with an electric mixer 1 minute; beat at medium speed 2 minutes. 

Pour batter into prepared pans. Bake at 350° for 30 to 32 minutes
Remove from oven.  Let cool for a few minutes. Then, with a wooden spoon handle, large fork or skewer poke holes in the warm cake at 1/2-inch intervals. Be sure to poke right down to the bottom of the cake. You want holes big enough so that the pudding has plenty of room to get to the bottom.

For the Pudding Filling:
Whisk together prepared pudding,  Dulce de Leche, and Kahlua, if desired, in a bowl until well blended.

Pour pudding over cake. (There will be some pudding mixture left over, so enjoy :).  Making sure to get right into the holes as much pudding as possible. Cover and put in the refrigerator to set for about 2 hours.

For the Topping:
Cut 6 turtle candies in half, and set aside for garnish. Dice remaining 9 turtle candies In a large bowl, fold cool whip into chocolate fudge frosting and diced candies. Spread over top of cake.

Drizzle with Dulce de Leche and fudge frosting over top; place turtle candies halves on top of each servings.
 
What I Think:
Although  I made the Dulce de Leche, it can be purchase at your local  supermarket.  It's very simple to make using the link provided,  just make ahead and refrigerate the day before. 


The Taste: The cake was DELICIOUS! It also best to serve this cake well chilled, so plan ahead or a day before serving.  The chocolate flavors intensify overnight!  This chocolaty sensation is definitely a GREAT REPEAT!  

For a more caramel taste, I think this would also be great,  just only using the Dulce de Leche for the filling. I think I'll try it that way next :)

ENJOY! Come again...

Linked to:
Feature Friday Link Party: Blissful and Domestic
Full Plate Thursday @ Miz Helen's Country Cottage 
Foodie Fridays @ Designs By Gollum
The Mandatory Mooch Tasty Thursday 
  @ 21st Century Housewife 
Food-Tastic Fridays @ Not Your Ordinary RecipesFoodie Friday @ Simple Living 
Simply Link Party: Simply Designing
Friday Flair Party: Whipper Berry
Foodie Friends Friday @ Foodie Friends FridayIt's a Hodgepodge Friday 
The Better Baker Weekend Potluck 
Show Case Your Talent  @What's Cooking Love
Shaken Together Life: {what's shakin' link party} 
Farm Girl Friday Blog Fest: Fresh Eggs Daily   
Miss Information: Freakin' Did It Friday  
 Strut Your Stuff Saturday @ Six Sister's Stuff
Something Swanky: Sweet Treats and Swanky Stuff Saturday 
Sunday Sweet Confessions: Mommy's Sweet Confessions  
Sweets for Saturday @ Sweet As Sugar Cookies 
Melt In Your Mouth Monday @ Make Ahead Meals for Busy Mom
Cupcakes Garden.: Just Desserts Thursday Link Party 
Sweet 2 eat Baking: Sugar Slice Sunday Link Party
Roxana’s Home Baking #chocolateparty   

Monday, November 12, 2012

Carrot Cake Cookies

Carrot Cake Cookies


Hi everybody :)

I did a double-take when I first saw these cookies. I knew I would be making them very soon.  It starts with my favorite obsession; CARROT CAKE It's made with a cake mix, plus you don't even have to wait for the butter to softened because you melt it! Super easy, huh? 

Then, I saw the recipe on the back of the cake box. It too look super delicious, with another one of my favorites; Oatmeal! I decided, I gotta do, what I gotta do...I combined the two!

So let's get it started... 
Carrot Cake Cookies adapted from Inside BruCrew & Duncan Hines Classic Decadent Box

Ingredients


1 carrot cake mix (I used Duncan Hines Classic Carrot Decadent)
1 teaspoon cinnamon1 cup white chocolate chips
1/2 cup Kraft caramel bits
1 cup oatmeal (I used 1/2 cup roll & 1/2 cup quick) not shown
1/2 cup butter, melted
2 eggs
1 teaspoon vanilla
Raisin & Carrots, reconstituted (from the box)
1/2  cup chopped walnuts


Instructions:

Reconstitute the raisins and carrots as directed on the box, if using Duncan Hines Classic Decadent. 

  In a large mixing bowl, combine the cake mix, oatmeal, cinnamon, white chips, caramel bits, sit aside.  
   Add the raisins and carrots to the cake mixture along with the walnuts.
   In a small bowl, mix the  butter, eggs, vanilla.  Add to cake mixture.  
   Stir by hand until combined or a stand mixer on low speed, mixture will be stiff.  
 Chill dough in refrigerator for at least 30 minutes. Form dough into 1- 1 1/2 inch balls, place  on baking sheet, and flatten with damp hands.
 Bake at 350 for 10-11 minutes. Let cool on pan 2-3 minutes. Gently remove from pan to cooling rack. Cool completely. Store in air tight container. Use a metal spatula to remove the cookies from the baking sheet. The caramel will start to stick to the pan if you leave it cool too much.  (I used parchment paper)
What I Think:
I think the combination of the two recipes were GREAT. Thick and Chewy. Definitely Another REPEAT!

For  Tropical Carrot Cake Cookies:
Omitted the caramel bits, and add about 2 tablespoons each, chopped dried Pineapple (reconstituted) & Coconut to the Raisin & Carrots mixture and proceed as directed.

And following the carrot cake tradition, I drizzle a Cream Cheese Glaze on top of the cookies, optional. 

For the Cream Cheese Glaze recipe found here.


ENJOY! Come again....

Linked to: 
Melt In Your Mouth Monday # 90 @ Make Ahead Meals for Busy Moms 
The Girl Creative: Just Something I whipped Up  
The Chicken Chick: Clever Chicks Blog Hop
Marvelous Mondays @ This Gal Cooks
Mop Up Mondays - I Should be Mopping the Floor    
Flour Me With Love: Mix it up Monday! 
An original Belle: Make It Yourself Monday
2012 Cookie Exchange: The Tumbleweed Contessa 
Crazy Sweet Tuesday Crazy for Crust

Friday, October 19, 2012

Strawberry Hearts Whoppie Pies: Pink Ribbon Intro.

Strawberry Hearts Whoppie Pies: Pink Ribbon Intro.

Strawberry Hearts Whoppie Pies


Hi everybody :)

Since October is Breast Cancer Awareness Month, I went to my local library to check out a book, Betty Crocker Living with Cancer Cookbook This book is full of recipes and helpful tips for anyone you may know dealing with breast cancer. It beautifully written with guidelines on what to eat for nausea, mouth sores, diarrhea and constipation, the most common side effects of cancer treatments.

Each recipe in the book come with health information and/or a doctor note explaining why the recipe is a good choice. 

 I will be sharing a few recipes from the book with you, each recipe will be part of my Pink Ribbon Series.
 
Although the recipe I'm sharing today is not apart of the series, I thought it would make a lovely introduction. Let's get it started...


For the Strawberry Hearts adapted here
1 package Strawberry Cake Mix (without the pudding)
2 eggs
3/4 cup shortening (not margarine)

Mix ingredients together, the dough will be stiffed. 
 To form the hearts roll the dough into equal-sized 24 balls, divide each ball in halves. Pinch the two halves together to form a heart shape, continue with remaining dough to form 24
hearts.


Bake at 350 for about 8 minutes on an ungreased cookie sheet, transfer to cooling rack.  Allow cookies to cool completely before sandwiching them.  To assemble; sandwich the two bottom sides together with the filling making 12 whoopie pies. 


For The Whoopie Filling adapted Wilton
6 tablespoons butter, softened
1 1/2 cups confectioners' sugar, sifted
1/8 teaspoon salt
1 jar marshmallow creme (about 7 oz)
1 teaspoon vanilla extract
Pink food coloring  (I use AmeriColor )
1-2 teaspoons strawberry jello, dry mix (optional)  for flavor
 
In large bowl, beat butter with electric mixer until creamy. Add sugar and salt to the butter; mix well. Add marshmallow creme and vanilla; blend well. Add food coloring and jello.


Makes about 2 1/2 cups, of filling, enough to fill 12 whoopie pies.


What I Did and or Think:
I followed the direction in making the cookies, be very careful not to make these too big they are very fragile. I bake the cookies on a parchment lined cookie sheet. I only made halve the filling recipe and added a little strawberry jello to it for flavor. I made a Pink Icing; recipe below. Some of the cookies I didn't sandwiched, just drizzled with the icing.


Pink Icing
2 tablespoons milk
1 drop pink food color (I use AmeriColor)
1/4 tsp strawberry jello, dry mix (for flavor) optional
1/3 cup powdered sugar or enough to make it drizzle
Blend together well and drizzle over cookies.


The taste: These are Deliciously Sweet; so when you make them, share them! :)

ENJOY! Come again....

Linked to
Sweet Treat Thursday Pink Link @ Something Swanky

Followers