Cappuccino Muffins : Breakfast Is Served
Hi everybody :)
"Welcome to another Breakfast Is Served Sunday!" If you're just tuning in to my post, every Sunday I try to post a Breakfast Is Served. Last week breakfast were Baked Strawberry Donuts. Today's recipe is about the coffee. If you're a coffee-lover, you are in for a treat because I'm making cappuccino muffins with a chocolatey mocha spread.
But before we get to the recipe, I must share a little confession with you all first... I am not a coffee drinker. Shocking, right? I know. I love the smell of coffee. Kahlua, the coffee flavored liqueur is one of my favorite things. Sometimes while shopping, I would find myself going down the coffee isle just to get a sniff of that amazing aroma. Although I don't drink coffee, I do LOVE baking with coffee, especially if chocolate is involved. So the answer to "how I like my coffee?", if asked, is: in cakes, cookies, pies, brownies, muffins, etc... :)
This
recipe was designed to make regular-sized muffins, but I like my muffins BIG :
) So I adjusted it for baking in a jumbo muffin pan. I also added Kahlua, espresso powder and toffee bits to make it even more 'Mocha-licious'. Here's what I did...
Chocolate Mocha Spread:
4 ounces cream cheese, softened
2 tablespoons sugar
1/2 teaspoon instant coffee granules or espresso powder
1 teaspoon Kahlua
1/2 teaspoon vanilla
1/4 cup miniature semisweet chocolate chips
2 tablespoons Toffee bits
Jumbo Muffins:
2 cups all-purpose flour
3/4 cup sugar
2 1/2 teaspoons baking powder
1/2 teaspoon ground cinnamon
1/2 teaspoon salt
1 cup milk
1 1/2 tablespoons instant coffee granules
1/2 tablespoon espresso powder
1/2 cup butter, melted
1 egg
1 teaspoon vanilla extract
3/4 cup miniature semisweet chocolate chips
3 tablespoons toffee bits
For the spread:
In a small bowl combine the all the ingredients mix until well blended; cover and refrigerate until serving
 For the Muffins:
In a large bowl, combine the flour, sugar, baking powder, cinnamon and salt.
In another bowl, combine milk coffee granules and powder until coffee is dissolved.
Add the butter, egg and vanilla. Stir into dry ingredients just until moistened. Fold in chocolate chips and bits
Fill greased or paper-lined jumbo muffin cups two-thirds full. Bake at 400 degree for 10 minutes, reduced oven temperature to 350 and baked 15 - 18 more minutes.
Source: The Taste of Home Baking Book or here
What I Think:
The muffins were definitely 'Mocha-liciously GOOD'. I love the flavors. The spread was amazing. It's an A.G.R. ladies; (Another Great REPEAT).
ENJOY! Come again...
Linked to:
Sweet 2 Eat Baking: Sugar & Slice Sunday
Mop Up Mondays - I Should be Mopping the Floor
BYOB @ Roxana's Home Baking : Baking Your Own Bread
Everyday Moms Meals
Watch Out Martha
Marvelous Mondays @ This Gal Cooks
The Chicken Chick: Clever Chicks Blog Hop
Recipe Sharing Monday @ Jam Hands
Melt In Your Mouth Monday @ Make Ahead Meals for Busy Moms
Flour Me With Love: Mix it up Monday!
For the Muffins:
In a large bowl, combine the flour, sugar, baking powder, cinnamon and salt.
In another bowl, combine milk coffee granules and powder until coffee is dissolved.
Add the butter, egg and vanilla. Stir into dry ingredients just until moistened. Fold in chocolate chips and bits
Fill greased or paper-lined jumbo muffin cups two-thirds full. Bake at 400 degree for 10 minutes, reduced oven temperature to 350 and baked 15 - 18 more minutes.
Source: The Taste of Home Baking Book or here
What I Think:
The muffins were definitely 'Mocha-liciously GOOD'. I love the flavors. The spread was amazing. It's an A.G.R. ladies; (Another Great REPEAT).
ENJOY! Come again...
Linked to:
Sweet 2 Eat Baking: Sugar & Slice Sunday
Mop Up Mondays - I Should be Mopping the Floor
BYOB @ Roxana's Home Baking : Baking Your Own Bread
Everyday Moms Meals
Watch Out Martha
Marvelous Mondays @ This Gal Cooks
The Chicken Chick: Clever Chicks Blog Hop
Recipe Sharing Monday @ Jam Hands
Melt In Your Mouth Monday @ Make Ahead Meals for Busy Moms
Flour Me With Love: Mix it up Monday!
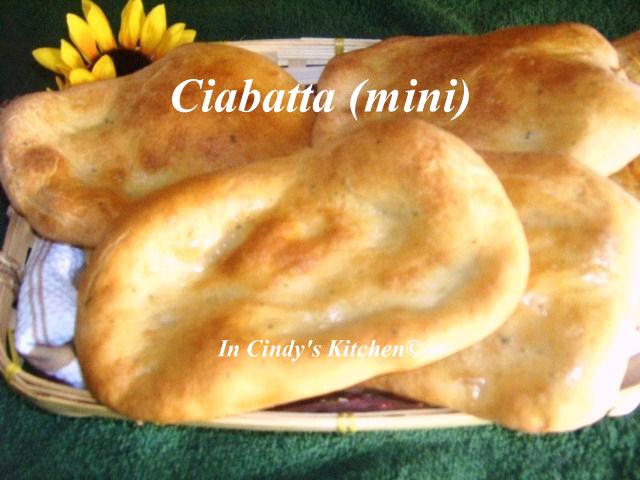
Asiago Ciabatta: Making Ciabatta
Hi everybody :)
It's time to bake some bread, I been working on a recipe I think you'll going to love. I always wanted to make homemade ciabatta loaves, so today I'm giving it a try :) The ciabatta start off with a sourdough starter called a biga starter. The biga starter sit overnight at room temperature for up to 20 hours, so plan ahead if you're are making these loaves. The starter is added to the remaining ingredients, the dough is than proofed up to 2 more hours. Then it is carefully shaped into long loaves about 12 x 4 inches each, proofed 45 more minutes and baked. I make a few changes by forming 1 big loaf and 4 mini loaves, adding Asiago cheese to the big loaf. Let's get it started...
Biga Starter
1 1/2 cups (6 3/8 ounces) King Arthur Unbleached All-Purpose Flour
1/4 cup (1 ounce) pumpernickel, rye, or whole wheat flour
1 cup (8 ounces) water
1/8 teaspoon instant yeast
Dough
all of the starter
2 1/2 cups (10 5/8 ounces) King Arthur Unbleached All-Purpose Flour
1/2 cup (4 ounces) water
1 tablespoon Pizza Dough Flavoring (optional)
1 1/2 teaspoons salt
1/2 teaspoon instant yeast
4 to 5 ounces Asiago or Parmesan cheese, cut into 1/4-inch dice (about 1 cup), plus extra for grating over the top of the bread
Biga:
Mix all of the biga ingredients in a medium-sized bowl until well-blended. (I mixed it and covered it at 12:00 p.m. yesterday.)
 Cover the bowl, and leave it at cool room temperature (68°F-70°F) for 12 to 20 hours, until the biga is very bubbly. (I let it sit until 8:00 a.m. today)
Dough:
Mix the biga and the remaining dough ingredients, except the cheese,
using
an electric mixer set on slow speed, for 2 to 4 minutes. Increase the
speed to medium and mix for about 4 minutes; the dough should be soft
and slightly sticky. Add additional water or flour if necessary.
Mix in
the cheese; don't worry if some pieces pop out.
(I divided the dough in halves and only added the cheese to 1/2 of the dough.)
Allow the dough to rise, in a greased, covered bowl, for 1 to 2 hours, until it's very puffy. Note: You can also mix this dough in a bread machine set on the dough cycle; add the diced cheese several minutes before the end of the final kneading cycle.
Cover the bowl, and leave it at cool room temperature (68°F-70°F) for 12 to 20 hours, until the biga is very bubbly. (I let it sit until 8:00 a.m. today)
Dough:
Mix the biga and the remaining dough ingredients, except the cheese,
using
an electric mixer set on slow speed, for 2 to 4 minutes. Increase the
speed to medium and mix for about 4 minutes; the dough should be soft
and slightly sticky. Add additional water or flour if necessary.
Mix in
the cheese; don't worry if some pieces pop out.
(I divided the dough in halves and only added the cheese to 1/2 of the dough.)
Allow the dough to rise, in a greased, covered bowl, for 1 to 2 hours, until it's very puffy. Note: You can also mix this dough in a bread machine set on the dough cycle; add the diced cheese several minutes before the end of the final kneading cycle.
Turn the dough out onto a well-floured surface, and shape it into two long loaves, about 12 x 4 inches each. Place the loaves, floured side up, onto parchment paper (if you plan to bake on an oven stone) or baking sheets.(I sprinkled with cheese before the 45 minutes proofing. Be very careful when shaping to keep the dough light and airy. Don't use foil because the cheese will stick to it, I find out the hard way)
(I shaped the other half into 4 mini ciabatta loaves.)
Cover the loaves with a proof cover or well-greased plastic wrap, and allow them to rise for 45 minutes, or until they're very puffy. Sprinkle them with additional grated cheese.
Bake the ciabatta in a preheated 450°F oven for 22 to 26 minutes, until it's golden brown. Remove it from the oven, and cool on a rack. Yield: 2 loaves.
Source: King Arthur Flour
What I Did and/or Think:
I really enjoy making these loaves, even though it was a bit time consuming.
The taste: I love the taste of the Asiago loaf better than the mini ones. The structure was airy with a chewy texture. To get the right structure be very careful when shaping, don't press the dough down, you want it to be nice and puffy with big air pockets. I will be REPEATING this one ladies. My loaves weren't as puffy as I would have liked, but they were delicious!
UPDATE: Here's what I did with the mini loaves. Mini Bruschetta Pizzas
ENJOY! Come again...
Linked to:
YeastSpotting! @ wildyeast
The Better Baker Weekend Potluck
BYOB @ Roxana's Home Baking : Baking Your Own Bread
Foodie Fridays @ Designs By Gollum
Full Plate Thursday @ Miz Helen's Country Cottage
Cherry Shortbread Sweet Hearts
Hi everybody :)
When I spotted this recipe, I knew I'll would be making them soon. They had two of my favorite things after all: chocolate and cherries, I couldn't resist :) Well, let's get it started...
Cherry Shortbread Sweet Hearts
1/2 cup maraschino cherries, well drained and chopped
1 1/4 cups all-purpose flour
3 tablespoons sugar
1/2 cup butter
1/4 cup finely chopped almonds
1/4 cup semisweet chocolate pieces
1/2 teaspoon shortening
Using paper towels, pat cherries dry. Set aside. In a medium bowl stir together flour and sugar. Cut in butter till mixture resembles coarse crumbs.
Stir in cherries. Knead till well combined and nearly smooth.

 On a lightly floured surface, roll dough to 1/2-inch thickness. Using a 1 1/2-inch heart-shaped cookie cutter, cut dough into heart shapes. Place 1 inch apart on an ungreased cookie sheet, bake in a 325 oven for 20 to 25 minutes or till done. Remove the cookies from the cookie sheet and cool on a wire rack.

Evenly spread almonds on waxed paper; set aside. In a small heavy saucepan heat chocolate and shortening over low heat just till melted, stirring occasionally. Using a pastry brush, brush bottoms of cookies with chocolate mixture. Press cookies with chocolate sides down into almonds. Place cookies with chocolate-almond sides up on a wire rack, let stand till the chocolate is set. Makes about 18.
Source: Better and Gardens Old-Fashioned Home Baking
What I Did and/or Think:
I doubled the recipe, added 1/4 teaspoon salt, refrigerated overnight and continue as directed baking half of recipe on my Silpat Baking Mat. I got 10 cookies.
I decided to have a little fun with some of the cookies by putting chocolate on half and adding white chocolate too :)
The Taste: The cookies were buttery with a very mild sweet taste from the chocolate and the cherries. I wish the flavor of cherries were more pronounced, I think refrigerating the dough and adding a teaspoon of cherry flavor or liqueur would help. It also was a great idea to add the salt, or use a salted butter. All in all I think the cookies are worthy of a REPEAT with the minor adjustments.
ENJOY! Come again...
Linked to:
Titus 2 Tuesday
Kathe With an E You're Gonna Love It
Tuesday-Talent-Show: Chef In Training
Show Me What Ya Got
Show and Share Wednesday Semi-Homemade Mom
Bizzy Bake Recipe Box
Sugar & Spice and Everything Nice @Seven Thirty Three